Renewing timing chain
|
|
|||||||||||||||||||||||||||||||||||||||||||||||||||||||||||||||||||||||||||||||||
|
05—320 Renewing timing chain
|
|||||||||||||||||||||||||||||||||||||||||||||||||||||||||||||||||||||||||||||||||
|
|
|||||||||||||||||||||||||||||||||||||||||||||||||||||||||||||||||||||||||||||||||
|
Tightening torques
Nuts for cylinder head cover Closing plug for chain tensioner
Special tool
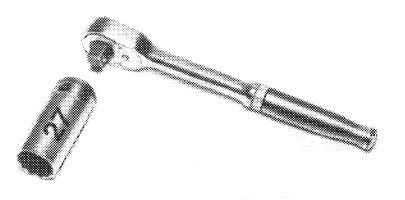
Socket 27 mm, 1/2″ square, for rotating engine
|
 |
Nm
15
90
001 589 65 09 00
|
|||||||||||||||||||||||||||||||||||||||||||||||||||||||||||||||||||||||||||||||
|
|
|||||||||||||||||||||||||||||||||||||||||||||||||||||||||||||||||||||||||||||||||
|
Note
|
|||||||||||||||||||||||||||||||||||||||||||||||||||||||||||||||||||||||||||||||||
|
|
|||||||||||||||||||||||||||||||||||||||||||||||||||||||||||||||||||||||||||||||||
|
The split timing chain with connecting link is used for repairs.
If only an endless timing chain is available, the chain can be opened prior to installation (refer to item 3).
During an engine overhaul, always install an endless timing chain.
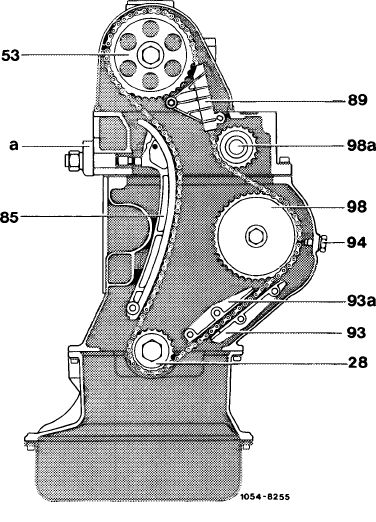
Check sprockets for score marks and pitting.
|
 |
||||||||||||||||||||||||||||||||||||||||||||||||||||||||||||||||||||||||||||||||
|
|||||||||||||||||||||||||||||||||||||||||||||||||||||||||||||||||||||||||||||||||
|
|
|||||||||||||||||||||||||||||||||||||||||||||||||||||||||||||||||||||||||||||||||
|
|
|||
|
Renewal
|
 |
||
|
1 Unscrew pencil element glow plugs.
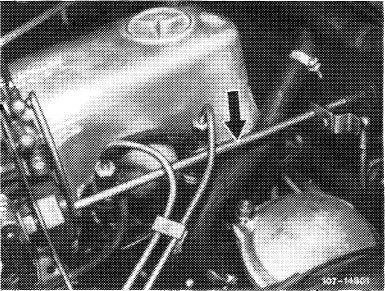
2 Disconnect regulating linkage to remove cylinder head cover. Pull out locking eye of longitudinal regulating shaft (arrow).
|
|||
|
Model 116.120
|
|||
|
|
|||
|
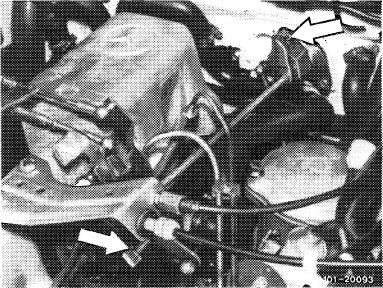
On models 116.120 and 123, pull longitudinal regulating shaft out of rubber mount in forward direction and remove in rearward direction.
On model 126.120, pull longitudinal regulating shaft out of guide lever in rearward direction and remove in forward direction.
|
 |
||
|
Model 123
|
|||
|
|
|||
|
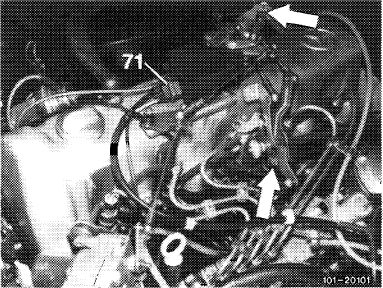
On models 123 with automatic transmission 722.303 (W 4 A 040) and 126.120, pull off central plug for vacuum lines (71) or vacuum lines. Disconnect Bowden wire, compress black plastic clip (arrow) and pull Bowden wire out of holder in rearward direction.
|
 |
||
|
Model 126.120
|
|||
|
|
|||
|
3 Remove chain tensioner (05—310).
4 Cover chain box with a rag and grind off both chain bolts on one link of timing chain.
5 Connect new timing chain to old timing chain, while simultaneously pushing out opened link (Fig. item 7).
|
|||
|
|
|||
|
05.8-320/2 F 2
|
|||
|
|
|||
|
|
||||
|
6 Turn crankshaft with tool combination slowly in direction of rotation of engine, while simultaneously pulling up the old timing chain until the connecting link comes to rest at uppermost position of camshaft sprocket.
Attention!
Timing chain should be in mesh with camshaft and crankshaft sprocket during rotation.
|
 |
|||
|
|
||||
|
TI00-643S/1
|
||||
|
|
||||
|
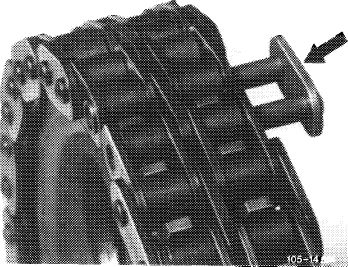
7 Disconnect old timing chain and connect the ends of the new timing chain by means of a connecting link. Mount lock washers.
|
 |
|||
|
|
||||
|
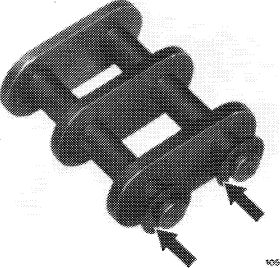
Note: Insert new connecting link from the rear so that the lock washers can be seen from the front (arrows).
|
 |
*1* SIS
|
||
|
|
||||
|
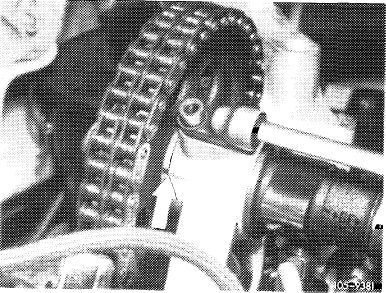
8 Rotate crankshaft and check adjusting marks at TDC position of engine.
Note: If the adjusting marks are not in alignment, check timing of camshaft (05—215) and begin of delivery of injection pump (07.1 — 110).
9 Install chain tensioner (05-310).
10 Screw in pencil-type glow plugs and mount cylinder head cover.
|
 |
|||
|
|
||||
|
05.8-320/3 F 2
|
||||
|
|
||||