Removal and installation of carburetor cover
|
|
||||||
|
07.2—192 Removal and installation of carburetor cover
|
||||||
|
|
||||||
|
Tightening torques
|
Nm
|
(kpm)
|
||||
|
|
||||||
|
with new insulating flange
|
10
|
(1.0)
|
||||
|
|
||||||
|
Carburetor fastening nuts
|
||||||
|
|
||||||
|
with insulating flange used up to now
|
8
|
(0.8)
|
||||
|
|
||||||
|
Special tool
|
||||||
|
|
||||||
|
Torque wrench 4—16 Nm (40—160 kpcm)
|
 |
000 589 67 21 00
|
||||
|
|
||||||
|
Removal
|
 |
|||||
|
1 Remove air filter.
|
||||||
|
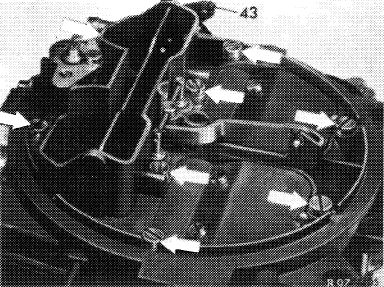
2 Pull off fuse (43) and disconnect choke rod.
|
||||||
|
3 Unscrew carburetor fastening nuts.
|
||||||
|
4 Unscrew carburetor cover fastening screws (arrow).
|
||||||
|
|
||||||
|
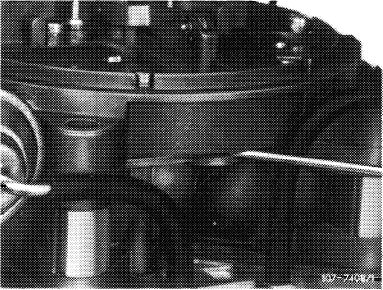
5 Force off carburetor cover at forcing-off point and remove.
|
 |
|||||
|
|
||||||
|
07.2.2 la—192/1
|
||||||
|
|
||||||
|
|
|||
|
Installation
|
 |
||
|
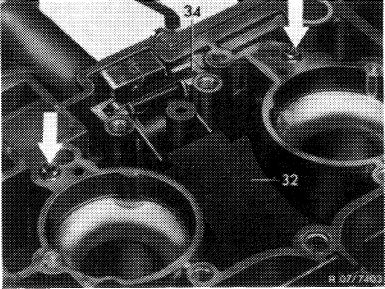
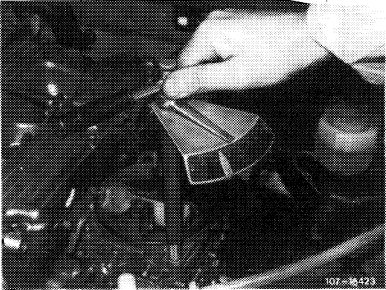
6 Install carburetor cover in vice versa sequence. Use new gasket.
Attention!
Prior to mounting carburetor cover, make sure that holddown (34) is installed.
|
|||
|
|
|||
|
Tighten carburetor fastening nuts uniformly and crosswise to specified torque.
Attention!
To prevent distortion of carburetor, tighten with a torque wrench only and up to specified torque.
|
 |
||
|
|
|||
|
07.2.2 la-192/2
|
|||
|
|
|||
Poprzedni