Renewing front crankshaft radial sealing ring
|
|
|||||||||||||||||||||||||||||
|
03—324 Renewing front crankshaft radial sealing ring
|
|||||||||||||||||||||||||||||
|
|
|||||||||||||||||||||||||||||
|
|||||||||||||||||||||||||||||
|
|
|||||||||||||||||||||||||||||
|
Torque wrench 150—500 Nm, 3/4″ square
|
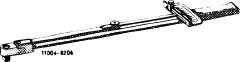 |
001 589 31 21 00
|
|||||||||||||||||||||||||||
|
|
|||||||||||||||||||||||||||||
|
Puller for balancing disc
|
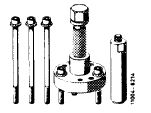 |
116 589 10 33 00
|
|||||||||||||||||||||||||||
|
|
|||||||||||||||||||||||||||||
|
Detent
|
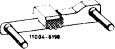 |
110 589 00 40 00
|
|||||||||||||||||||||||||||
|
|
|||||||||||||||||||||||||||||
|
Socket 27 mm, 1/2″ square
|
 |
001 589 65 09 00
|
|||||||||||||||||||||||||||
|
|
|||||||||||||||||||||||||||||
|
Puller for spacing ring
|
 |
616 589 00 33 00
|
|||||||||||||||||||||||||||
|
|
|||||||||||||||||||||||||||||
|
Installer for radial sealing ring
|
 |
130 589 00 61 00
|
|||||||||||||||||||||||||||
|
|
|||||||||||||||||||||||||||||
|
Conventional tool
|
|||||||||||||||||||||||||||||
|
|
|||||||||||||||||||||||||||||
|
Adaptor 3/4″ square socket to 1/2″ square head
|
e.g. made by Hazet, D-5630 Remscheid order no. 1058 R-1
|
||||||||||||||||||||||||||||
|
|
|||||||||||||||||||||||||||||
|
Note
|
 |
||||||||||||||||||||||||||||
|
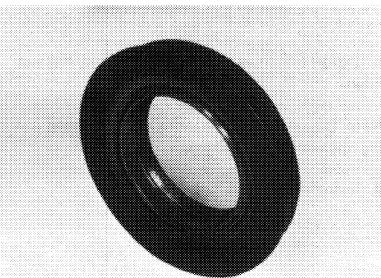
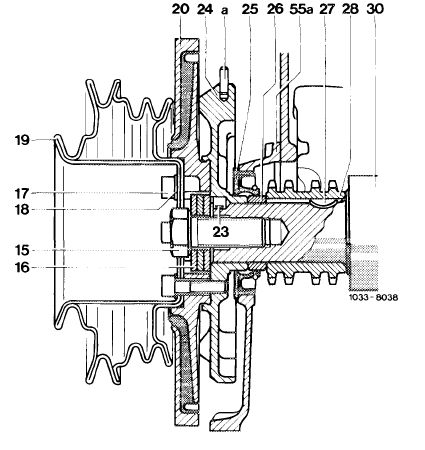
The radial sealing ring is a so-called combination ring with all-around shoulder and contoured outer ring.
The ring consists of two different materials.
Inside: Viton (green) Outside: Acryl (black)
This radial sealing ring requires no chrome-plated spacing ring.
|
|||||||||||||||||||||||||||||
|
|
|||||||||||||||||||||||||||||
|
03.8-324/1 F 2
|
|||||||||||||||||||||||||||||
|
|
|||||||||||||||||||||||||||||
|
|
|||
|
Removal
|
 |
||
|
1 Remove cooler and fan.
2 Remove pulley (19), vibration damper (20) and balancing disc (24) (03-340).
3 Push out radial sealing ring by means of a screwdriver. Make sure that crankshaft journal and mounting bore are not damaged.
|
|||
|
|
|||
|
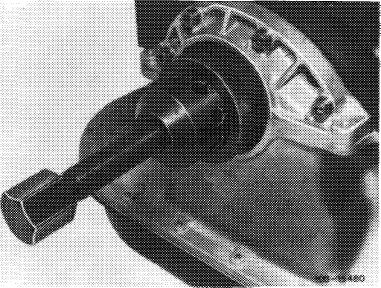
4 Pull off spacing ring with puller, if noticeably worn.
|
 |
||
|
|
|||
|
Installation
|
|||
|
|
|||
|
5 Deburr mounting bore for radial sealing ring and clean.
Note: Do not provide mounting bore and radial sealing ring with sealing compound.
6 Install new spacing ring.
|
|||
|
|
|||
|
03.8-324/2 F 2
|
|||
|
|
|||
|
|
|||
|
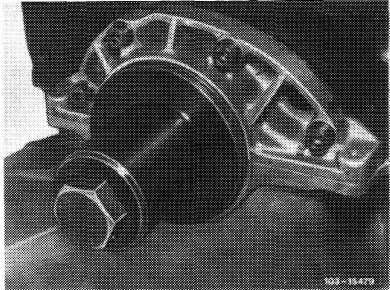
7 Coat new radial sealing ring on sealing lip and in range of dust-sealing lip with grease and insert by means of installer.
Attention!
The radial sealing ring should be accurately square in relation to crankshaft journal, since otherwise no perfect sealing will be obtained.
|
 |
||
|
|
|||
|
8 Install balancing disc, vibration damper and pulley (03-340).
9 Install fan and cooler.
|
|||
|
|
|||
|
03.8-324/3 F 2
|
|||
|
|
|||