Removal and installation of front cylinder crankcase cover
|
|
|||||||||||||||||||||||||||||||||||||||||||||||||||||||
|
01—215 Removal and installation of front cylinder crankcase cover
|
|||||||||||||||||||||||||||||||||||||||||||||||||||||||
|
|
|||||||||||||||||||||||||||||||||||||||||||||||||||||||
|
Tightening torques
|
Nm
|
||||||||||||||||||||||||||||||||||||||||||||||||||||||
|
|
|||||||||||||||||||||||||||||||||||||||||||||||||||||||
|
Screw M 18 x 1.5 x 45 on crankshaft
|
270-330
|
||||||||||||||||||||||||||||||||||||||||||||||||||||||
|
|
|||||||||||||||||||||||||||||||||||||||||||||||||||||||
|
Screws M 8 x 30
|
35
|
||||||||||||||||||||||||||||||||||||||||||||||||||||||
|
|
|||||||||||||||||||||||||||||||||||||||||||||||||||||||
|
Drain plug radiator
|
Model 116.120
|
6-10
|
|||||||||||||||||||||||||||||||||||||||||||||||||||||
|
|
|||||||||||||||||||||||||||||||||||||||||||||||||||||||
|
|||||||||||||||||||||||||||||||||||||||||||||||||||||||
|
|
|||||||||||||||||||||||||||||||||||||||||||||||||||||||
|
Torque wrench 150—500 Nm, 3/4″ square
|
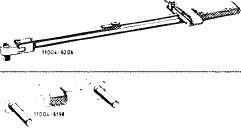 |
001 589 31 21 00
|
|||||||||||||||||||||||||||||||||||||||||||||||||||||
|
Detent
|
110 589 00 40 00
|
||||||||||||||||||||||||||||||||||||||||||||||||||||||
|
|
|||||||||||||||||||||||||||||||||||||||||||||||||||||||
|
Puller for balancing disc
|
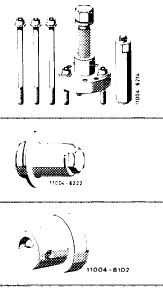 |
116 589 10 33 00
|
|||||||||||||||||||||||||||||||||||||||||||||||||||||
|
Installation tool for radial sealing ring
|
130 589 00 61 00
|
||||||||||||||||||||||||||||||||||||||||||||||||||||||
|
Sleeve for centering front cover and oil pan
|
617 589 00 14 00
|
||||||||||||||||||||||||||||||||||||||||||||||||||||||
|
|
|||||||||||||||||||||||||||||||||||||||||||||||||||||||
|
Conventional tool
|
|||||||||||||||||||||||||||||||||||||||||||||||||||||||
|
|
|||||||||||||||||||||||||||||||||||||||||||||||||||||||
|
Connection 3/4″ square socket to 1/2″ square head
|
e.g. made by Hazet, D-5630 Remscheid order no. 1058 R-1
|
||||||||||||||||||||||||||||||||||||||||||||||||||||||
|
|
|||||||||||||||||||||||||||||||||||||||||||||||||||||||
|
Removal
|
|||||||||||||||||||||||||||||||||||||||||||||||||||||||
|
|
|||||||||||||||||||||||||||||||||||||||||||||||||||||||
|
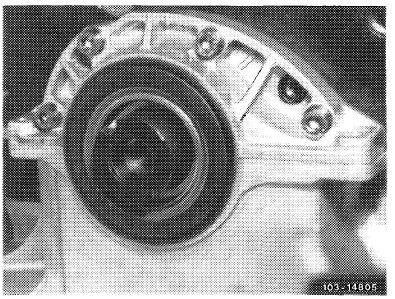
1 Remove pulley, vibration damper and balancing disc (03-340).
2 Remove front crankshaft radial sealing ring (03-324).
|
|||||||||||||||||||||||||||||||||||||||||||||||||||||||
|
|
|||||||||||||||||||||||||||||||||||||||||||||||||||||||
|
01.8-215/1 F2
|
|||||||||||||||||||||||||||||||||||||||||||||||||||||||
|
|
|||||||||||||||||||||||||||||||||||||||||||||||||||||||
|
|
|||
|
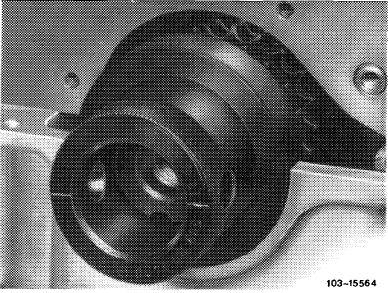
3 Unscrew cover and remove.
4 Thoroughly clean sealing surfaces of cover and on oil pan top.
|
 |
||
|
|
|||
|
Installation
|
 |
||
|
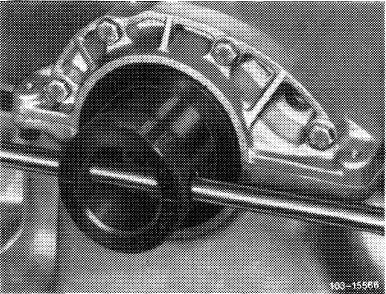
5 Slip sleeve for centering cover on crankshaft journal.
Attention!
If except for the cover, the complete oil pan has also been installed, reinstall oil pan again first. For this purpose, place sleeve on crankshaft journal.
|
|||
|
|
|||
|
6 Coat all sealing surfaces with sealing compound, part no. 001 989 46 20.
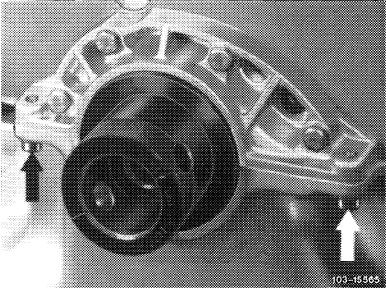
7 Position cover and screw down.
Attention!
Tighten screws in oil pan first (arrows).
|
 |
||
|
|
|||
|
8 Remove sleeve. If sleeve cannot be removed, insert mandrel into cross hole and turn out.
9 Install new crankshaft radial sealing ring (03—324).
10 Install pulley, vibration damper and balancing disc (03-340).
|
 |
||
|
|
|||
|
01.8-215/2 F2
|
|||
|
|
|||