Removal and installation of fuel expansion tank
|
|
|||
|
47—705 Removal and installation of fuel expansion tank
|
|||
|
|
|||
|
A. Model 107.04
|
|||
|
|
|||
|
Note
|
|||
|
|
|||
|
On models 107.02, 116, 123 and 126 sedan and coupe the fuel expansion tank is integrated in fuel tank and cannot be disassembled.
|
|||
|
|
|||
|
Removal
|
 |
||
|
1 Remove hard top. Open top lock and remove top.
2 Remove trunk mat.
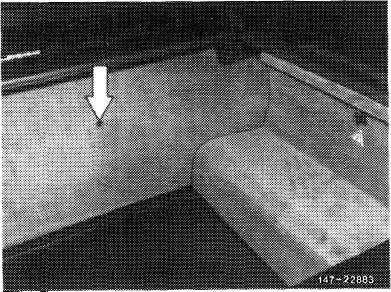
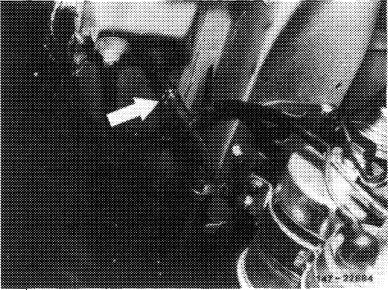
3 Unscrew fastening screw (arrow) for expansion tank.
|
|||
|
|
|||
|
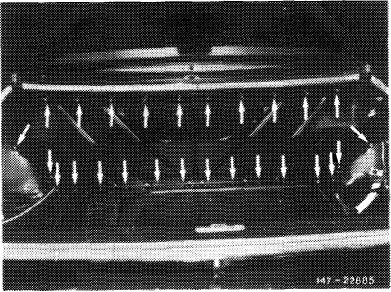
4 Unscrew rear wall and remove. For this purpose, loosen lining in upper edge range and laterally and unscrew fastening screws (arrows).
|
 |
||
|
|
|||
|
5 On vehicles with battery in trunk, remove battery and battery encasing (arrows).
|
 |
||
|
|
|||
|
47.2 lib—705/1 F2
|
|||
|
|
|||
|
|
||||
|
6 Remove protective sleeve (arrow) and unclip vent line from holding clamp.
|
 |
|||
|
|
||||
|
7 On (aus) , (J) and (usa) version vehicles, pull fuel hose (arrow) from vent line.
|
 |
|||
|
|
||||
|
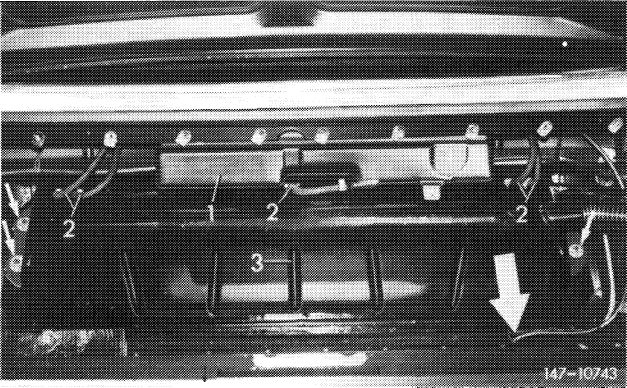
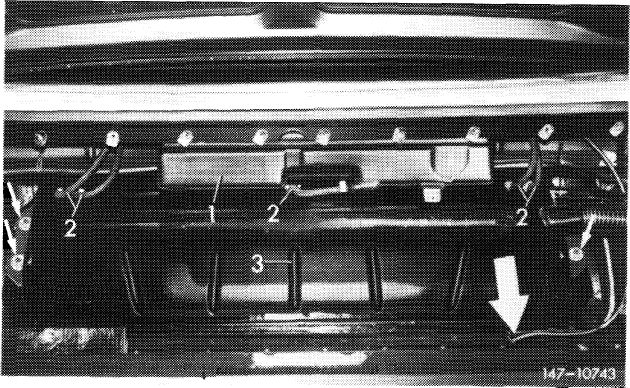
8 Remove fuel hoses (2) on fuel tank or on expansion tank.
Note: If the fuel hoses are removed or mounted on expansion tank, apply counterhold to connections when loosening or tightening hose clamps.
|
||||
|
|
||||
|
1 Expansion tank
2 Fuel hoses
3 Fuel tank Large arrow = Vent line
|
 |
|||
|
|
||||
|
47.2 llb-705/2 F2
|
||||
|
|
||||
|
|
||||
|
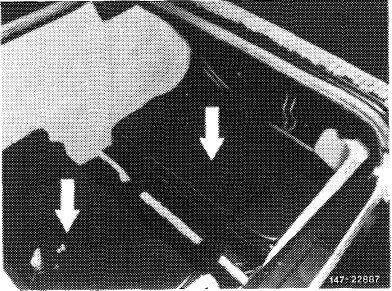
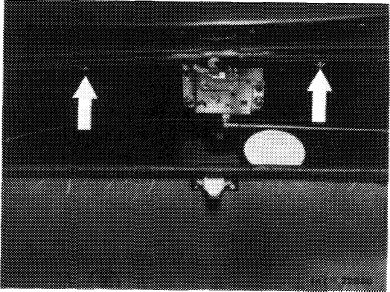
9 Unscrew fastening screws (arrows) and remove expansion tank, while pulling out black vent line in upward direction through trunk floor.
|
 |
|||
|
|
||||
|
Installation
|
||||
|
|
||||
|
10 For installation proceed vice versa. Make sure that the vent line is installed first behind filler neck of fuel tank.
Note: Check fuel system for leaks.
|
||||
|
|
||||
|
Large arrow = Vent line
|
 |
|||
|
|
||||
|
47.2 llb-705/3 F2
|
||||
|
|
||||
|
|
|||
|
B. Model 123.09 T-sedan
|
|||
|
|
|||
|
Removal
|
 |
||
|
1 Remove spare wheel casing and spare wheel.
Slightly lift spare wheel casing during removal until pins (arrows) are disengaging.
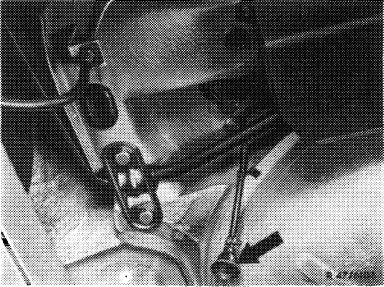
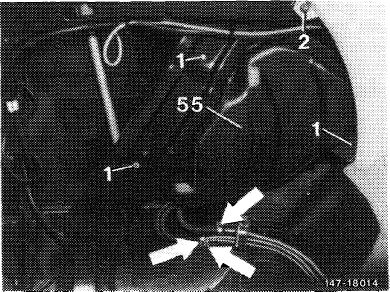
2 Unscrew fastening screw (2) of lateral lining.
3 Loosen hose clamps (arrows) on vent lines and pull off hoses, tightly close lines and hoses.
4 Unscrew fastening screws (1) of expansion tank (55). For this purpose, slightly lift side and wheel house panelling at front fastening screw seen in driving direction. Remove expansion tank.
|
|||
 |
|||
|
Installation
|
|||
|
|
|||
|
5 For installation proceed vice versa.
|
|||
|
|
|||
|
Note: Check hose connections for leaks.
|
|||
|
|
|||
|
47.2 lib—705/4 F2
|
|||
|
|
|||