Checking injection valves
|
|
||||
|
07.3—135 Checking injection valves
|
||||
|
|
||||
|
Test values
|
||||
|
|
||||
|
Injection valves
|
Bosch no. 0 437 502 010
|
|||
|
|
||||
|
with new injection valves
|
3.5—4.1 bar gauge pressure
|
|||
|
|
||||
|
Opening pressure
|
||||
|
|
||||
|
with used injection valves min.
|
3.0 bar gauge pressure
|
|||
|
|
||||
|
Tightening torques
|
Nm
|
|||
|
|
||||
|
Injection lines on fuel distributor (reference value)
|
10-12
|
|||
|
|
||||
|
Injection lines on injection valves (reference value)
|
10-15
|
|||
|
|
||||
|
Conventional test instruments and accessories
|
||||
|
|
||||
|
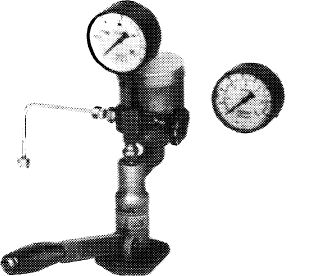
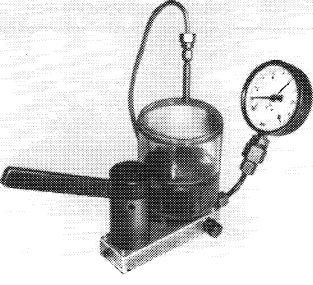
Valve tester Bosch KDJE-P 400
|
Bosch order designation KDJE-P 400
|
|||
|
|
||||
|
Nozzle tester EFEP60 H1)
|
Bosch no. 0 684 200 700
|
|||
|
|
||||
|
Pressure gauge 0—6 bar gauge pressure housing dia. = 100 mm Grade 1.0
|
Bosch no. 1 687 231 000
|
|||
|
|
||||
|
Pipe line
|
Bosch no. 1 680 750 001
|
|||
|
|
||||
|
) Corresponds with former nozzle testers. For testing injection valves, a specified pressure gauge or pressure gauge of pressure measuring device 100 589 13 21 00 is required.
|
||||
|
|
||||
|
Note
|
||||
|
|
||||
|
The nozzle or valve tester is used for testing opening pressure, for buzzing test, for evaluating jet and to test injection valves for leaks.
Prior to starting with injection valve test, the container of the tester must be filled and the unit must be bled. For testing, use kerosene only.
|
||||
|
|
||||
|
107-10592
 |
||||
|
|
||||
|
07.3.2 I la—135/1 F2
|
||||
|
|
||||
|
|
|||||
|
Replace injection valves, which are exceeding tolerance. Injection valves can be individually replaced within a set.
|
 |
107-14212
|
|||
|
|
|||||
|
Testing
|
|||||
|
|
|||||
|
For testing, remove injection valves (07.3—215).
1 Coase leak test:
a) Connect removed injection valves to tester. Bleed pressure line with shutoff valve opened and coupling nut released. Then tighten coupling nut.
b) With shutoff valve opened, slowly operate hand lever (4 s/stroke) and built-up pressure up to max. 1.5 bar gauge pressure. If a leak on injection valve shows up, replace injection valve.
2 Check opening pressure.
Close shutoff valve. Flush injection valve by moving hand lever several times back and forth.
Open shutoff valve and check opening pressure by slowly moving hand lever back and forth.
3 Fine leak test:
Close shutoff valve. Flush injection valve by moving hand lever several times back and forth. Open shutoff valve, increase pressure slowly up to 0.5 bar gauge pressure below previously determined opening pressure and hold. No drop should show up on injection valve within 15 seconds.
4 Buzzing test, evaluation of jet:
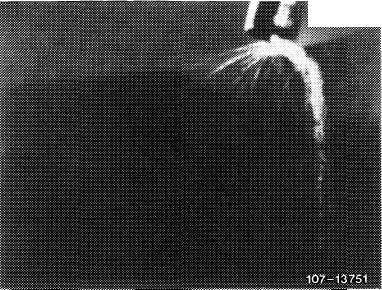
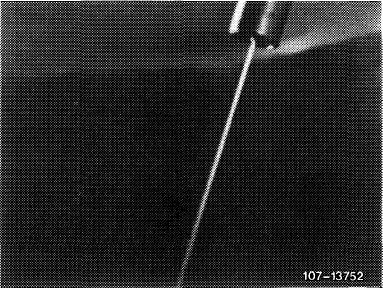
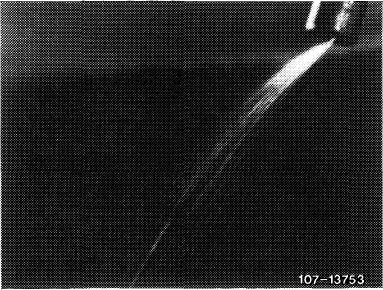
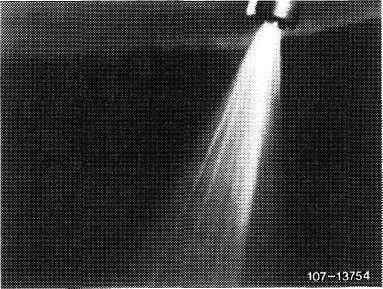
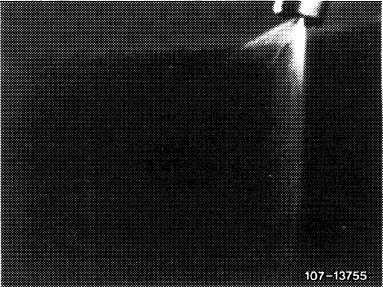
Close shutoff valve and flush valve by moving hand lever several times back and forth (0.5 s/stroke). Then reduce lever speed to approx. 1 s/stroke. Valve should now buzz. No drop should show up at mouth of valve. No cord-like jet should show up. One-sided, atomized jet formation within a total spray angle of approx. 35° is permitted.
|
|||||
|
|
|||||
|
07.3.2 lla-135/2
|
F 2
|
||||
|
|
|||||
|
|
||||
|
Damaged injection valves
|
Drop formation
|
„… … ..?.£.■■
|
||
|
|
||||
|
Cord-like jet
|
 |
|||
|
|
||||
|
Spreading jet
|
 |
|||
|
|
||||
|
Good injection valves
|
 |
|||
|
Good jet preparation
|
||||
|
|
||||
|
07.3.2 Ma—135/3 F2
|
||||
|
|
||||
|
|
|||
|
Slightly one-sided atomization
|
 |
||
|
|
|||
|
07.3.2 I la—1 35/4 F2
|
|||
|
|
|||
Poprzedni
Checking delivery capacity of fuel pump
Nowsze
