Adjusting float level
|
|
|||
|
07.2-180 Adjusting float level
|
|||
|
|
|||
|
Testing and adjusting values
|
|||
|
|
|||
|
Float version
|
Float level1)
|
||
|
|
|||
|
Flat roof float
|
~2 to 6 mm3)
|
||
|
|
|||
|
Hip roof float and fuel return valve without fuel pressure control
|
0 mm2)
|
||
|
|
|||
|
Hip roof float and fuel return valve with fuel pressure control
|
+ 2
|
||
|
|
|||
|
’) Measured from parting surface without gasket.
2) With starting or bypass faults, set 2 mm higher.
3) Below parting surface.
|
|||
|
|
|||
|
Conventional tool
|
|||
|
|
|||
|
Depth gauge or slide gauge with depth gauge
|
|||
|
|
|||
|
Note
|
|||
|
|
|||
|
The float level has an influence on starting characteristics particularly on gradients. If it is too low, the starting performance may become poorer, because the fuel level in mixing tubes of stage I is too low and the main jet system will start too late. In the event of starting faults, set to upper float level tolerance value.
|
|||
|
|
|||
|
Testing, adjusting
|
 |
||
|
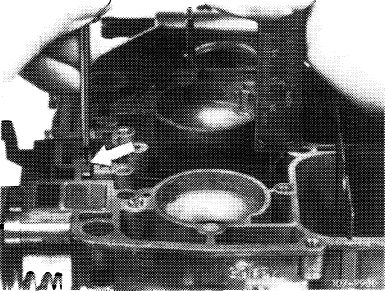
1 Check float level and adjust, if required. For this purpose, push connecting web (arrow) downwards against noticeable stop and check float level without gasket.
Attention!
To prevent measuring errors, make sure that the float shaft rests on housing base while testing.
|
|||
|
Measuring with flat roof float
|
|||
|
|
|||
|
07.2.2 la-180/1
|
|||
|
|
|||
|
|
|||
|
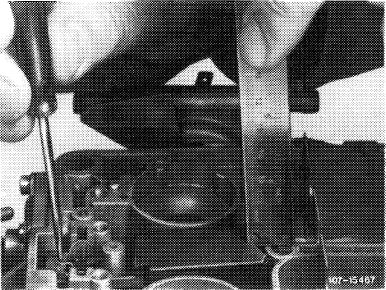
Measuring with hip roof float
|
 |
||
|
|
|||
|
2 Correct float level by rebending at specified bending spot (arrow).
|
 |
||
|
|
|||
|
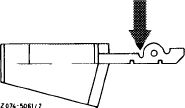
3 When installing float, attach float needle with wire clip to float arm in such a manner that the open side of the clip is pointing in driving direction.
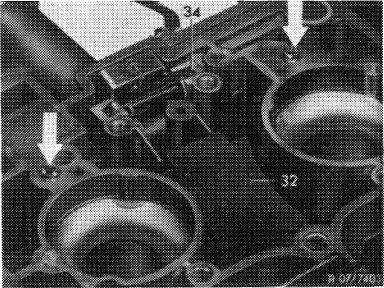
Install float (32), making sure that the float shaft rests on base of recesses. Install holddown (34). Holddown should project slightly over parting surface. Rebend, if required.
|
 |
||
|
|
|||
|
07.2.2 la-180/2
|
|||
|
|
|||