Repairing and squaring connecting rods
|
|
||||||||||||||||||||||||||||||||||||||||||||||||
|
03—313 Repairing and squaring connecting rods
|
||||||||||||||||||||||||||||||||||||||||||||||||
|
|
||||||||||||||||||||||||||||||||||||||||||||||||
|
Data
|
||||||||||||||||||||||||||||||||||||||||||||||||
|
|
||||||||||||||||||||||||||||||||||||||||||||||||
|
||||||||||||||||||||||||||||||||||||||||||||||||
|
|
||||||||||||||||||||||||||||||||||||||||||||||||
|
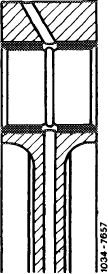
Permissible difference in parallel between axes: conrod bearing bore to conrod bushing bore in reference to a length of 100 mm
|
dia. 0.015
|
|||||||||||||||||||||||||||||||||||||||||||||||
|
|
||||||||||||||||||||||||||||||||||||||||||||||||
|
||||||||||||||||||||||||||||||||||||||||||||||||
|
|
||||||||||||||||||||||||||||||||||||||||||||||||
|
03.2-313/1 F3
|
||||||||||||||||||||||||||||||||||||||||||||||||
|
|
||||||||||||||||||||||||||||||||||||||||||||||||
|
|
|||
|
Note
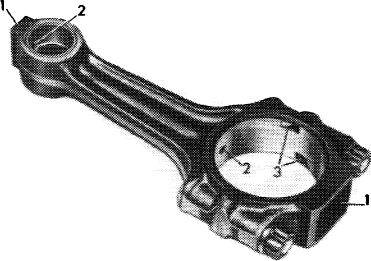
Connecting rods, which are overheated (blue discoloration) due to bearing damage, may not be re-used.
The connecting rod and its cap are marked to fit together. The connecting rod stem must not show cross scoring and notches.
Connecting rods with a machined conrod bushing are delivered as replacement parts.
When renewing conrods pay attention to different weights of rods.
|
 |
||
|
|
|||
|
Repairing
|
 |
||
|
1 Check conrod bolts and replace if necessary (03-310).
|
|||
|
|
|||
|
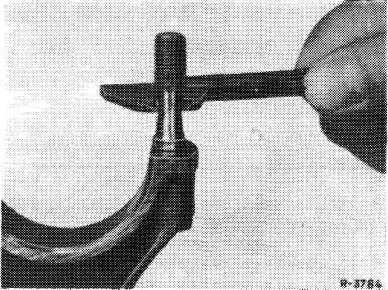
2 Check conrod bolt bores.
|
|||
|
|
|||
|
Place conrod cap on a conrod bolt. If the conrod cap moves down by its own weight, the connecting rod must be replaced.
|
 |
||
|
|
|||
|
3 Mount connecting rod bearing cap and tighten to 40-50 Nm and 90-100° angle of rotation torque.
|
 |
||
|
4 Measure conrod bearing basic bore. If a basic bore exceeds the value of 51.62 mm or shows conicity, hone bearing surface of bearing cap on a surface plate up to max. 0.02 mm.
|
|||
|
|
|||
|
03.2-313/2 F3
|
|||
|
|
|||
|
|
|||||
|
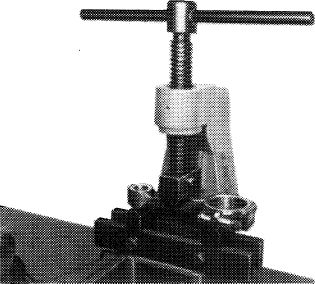
5 Press in new conrod bushing that oil bores match. Installation pressure 2500 Nm.
6 Mill or ream out conrod bushing.
7 Hone side bearing surfaces of connecting rod on a surface plate.
|
 |
||||
|
|
|||||
|
Squaring
|
|||||
|
|
|||||
|
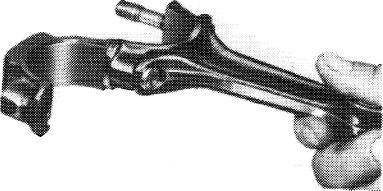
8 Square connecting rod with a conrod tester.
|
|||||
|
|
|||||
|
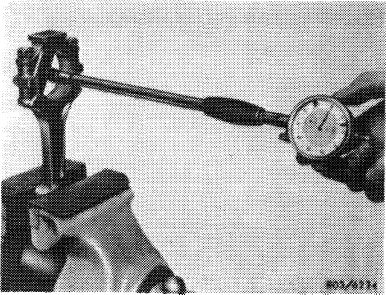
9 Align parallel of conrod bore to conrod bushing bore.
|
 |
103-11174
|
|||
|
|
|||||
|
10 Correct stagger of conrod bore to conrod bushing bore.
|
 |
-11173
|
|||
|
|
|||||
|
03.2-313/3 F3
|
|||||
|
|
|||||