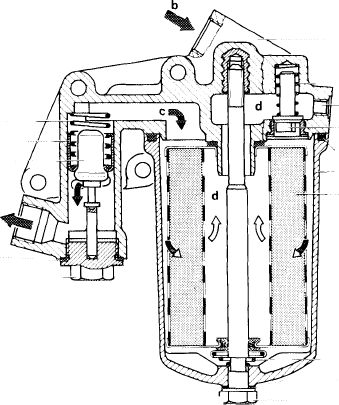
Removal and installation of thermostat in oil filter upper section
|
|
|||
|
18—125 Removal and installation of thermostat in oil filter upper section
|
|||
|
|
|||
|
Tightening torques
|
Nm
|
||
|
|
|||
|
Closing plug oil thermostc
|
120-140
|
||
|
|
|||
|
Oil drain plug on air oil cooler, models 107, 114, 116
|
30-35
|
||
|
|
|||
|
Attention!
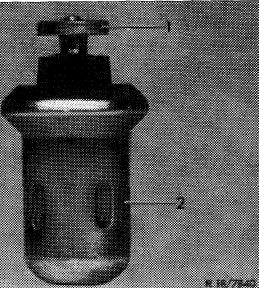
A well functioning thermostat may only be removed at temperatures below 60°C, since otherwise the pressure pin will be pressed out.
Pressure pin (1) must never be pulled out of wax thermostat (2), since otherwise the function cannot be guaranteed.
|
 |
||
|
|
|||
|
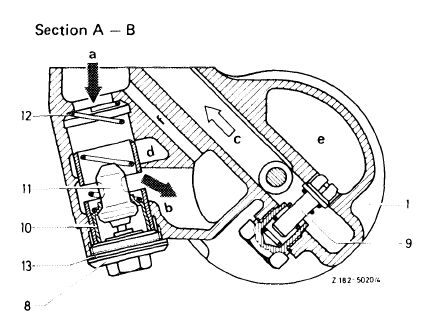
Models 107,114,116
|
 |
||
|
8 Plug
10 Control valve
11 Thermostat
12 Spring
13 Seal
|
|||
|
|
|||
|
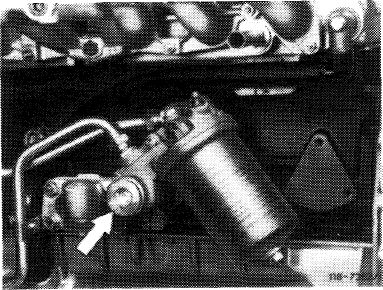
Removal
|
 |
||
|
1 Unscrew plug (arrow) and catch escaping engine oil.
2 Remove thermostat (11) with control valve (10) and spring (12).
|
|||
|
|
|||
|
18.2-125/1 F3
|
|||
|
|
|||
|
|
|||||
|
Installation
|
|||||
|
|
|||||
|
3 Guide thermostat (11) with control valve (10) and spring (12) into filter upper section and position spring in housing by turning the control valve.
4 Torque plug to 120—140 Nm.
5 Check function of thermostat (18-120) and check plug for leaks.
6 Correct oil level.
|
1183 -67ttk
|
2 3 4 5 6 -7
|
|||
|
Model 123 and models 107,116 with continuous fuel
injection
Model 116.020 2nd version and Model 126
|
15 14 13
|
||||
|
11 Plug
12 Seal
13 Thermostat
14 Control valve
15 Spring
|
12 11
|
||||
|
8 9 10
|
|||||
|
|
|||||
|
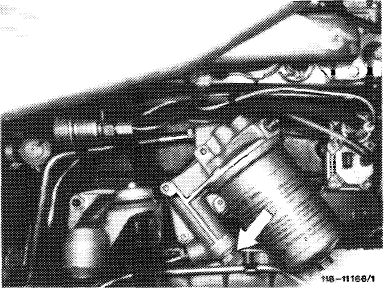
Removal
|
 |
||||
|
1 Unscrew plug (arrow) and catch escaping engine oil.
2 Remove thermostat (13) with control valve (14) and spring (15).
|
|||||
|
|
|||||
|
Installation
|
|||||
|
|
|||||
|
3 Guide thermostat (13) with control valve (14) and spring (15) into filter upper section.
4 Torque plug (11) to 120-140 Nm.
5 Check function of thermostat (18-120) and plug for leaks.
6 Correct oil level.
|
|||||
|
|
|||||
|
18.2-125/2 F3
|
|||||
|
|
|||||
Poprzedni
