Removing and installing radiator
WIS 20-4200
Preceding work: Operation no. of operation texts and work units or standard texts Warning instructions when hood open (01-0085). and flat rates Coolant drained at radiator (20-0100). 20-3865 – 20-4535 Bottom engine compartment panel removed (Maintenance Manual Volume 2, Op. no. 6190)
A. Models 107, 124, 126
»200112–55
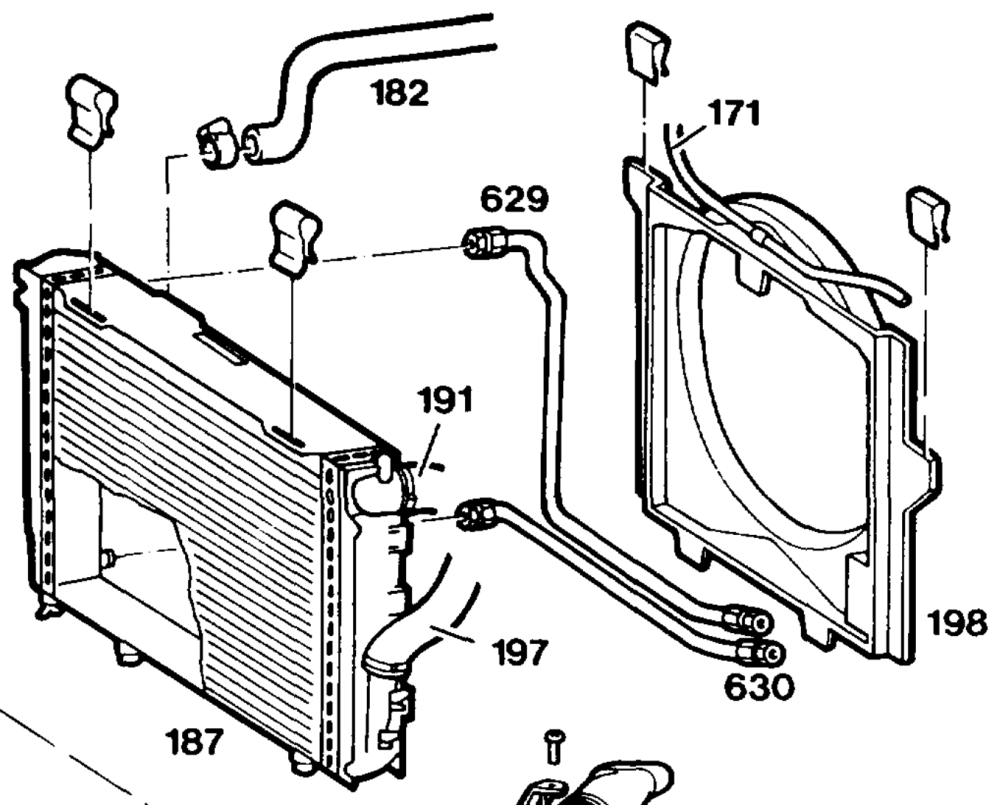
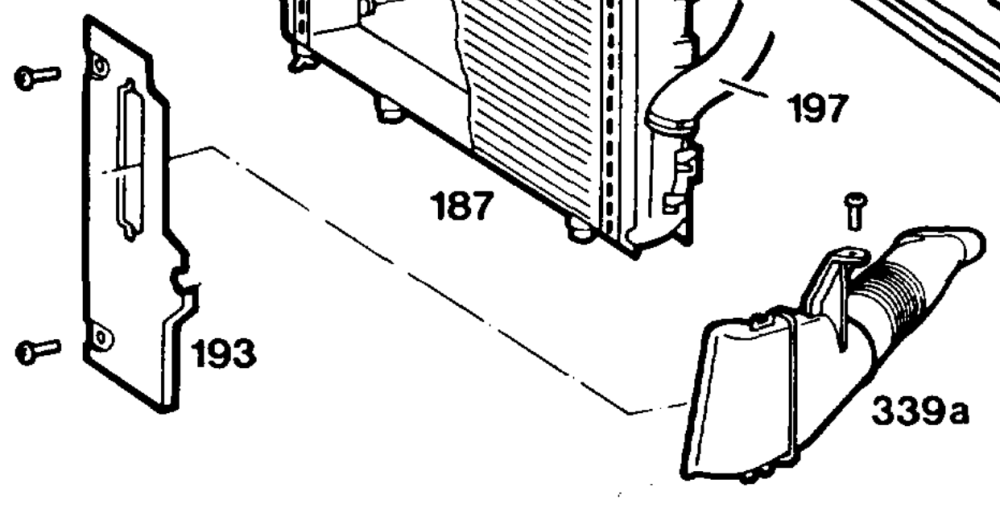
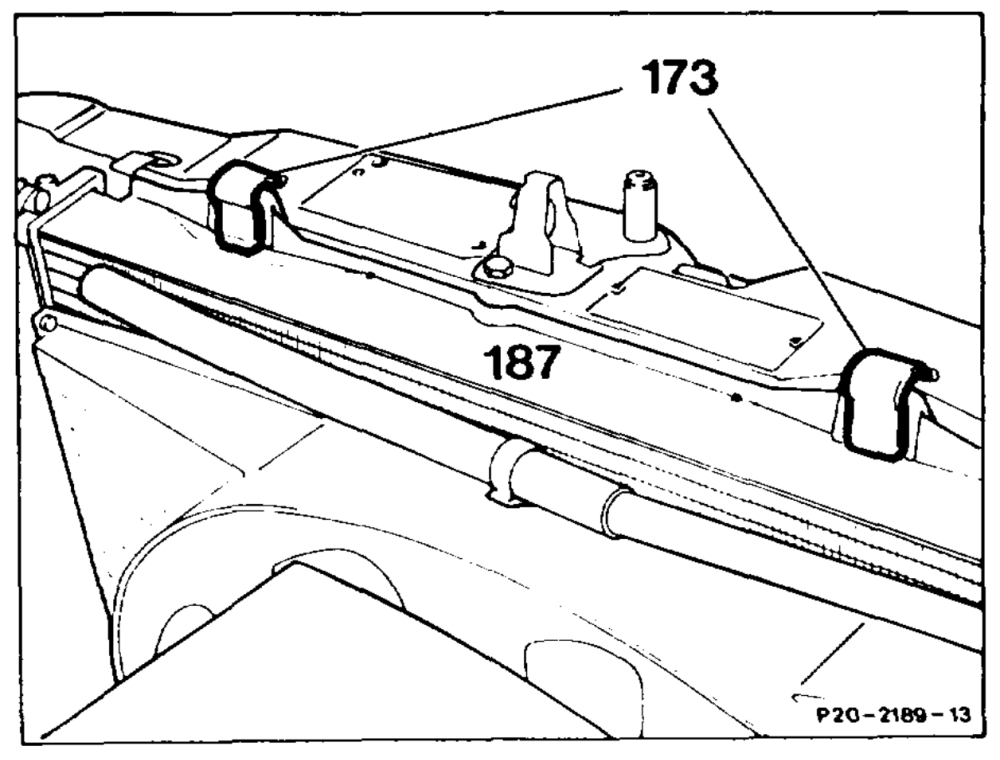
Coolant hoses (171, 182, 191, 197) ………. detach, attach (step 1). Connection for overflow hose ………..-… check, renew if necessary (step 2). Air scoop (339a) on Model 124 …………. remove, install (step 3). Fan cowl (198) 02… eee ee eee detach, attach (step 4). Radiator cover (193) on Model 124 ………. detach, attach (step 5). If automatic transmission fitted: Oil lines (629, 630) …..-……-…..2-065 detach, attach, 20 Nm. Check oil level. (step 5). Radiator (187) 2… ee ee ee eee remove, install (step 6). Installation 2.2… 2.0… 2. eee eee eee in the reverse order. Cooling system «2… 6. eee eee eee check for leaks (20-0170).
quis §=RA 20.1133-4200/1
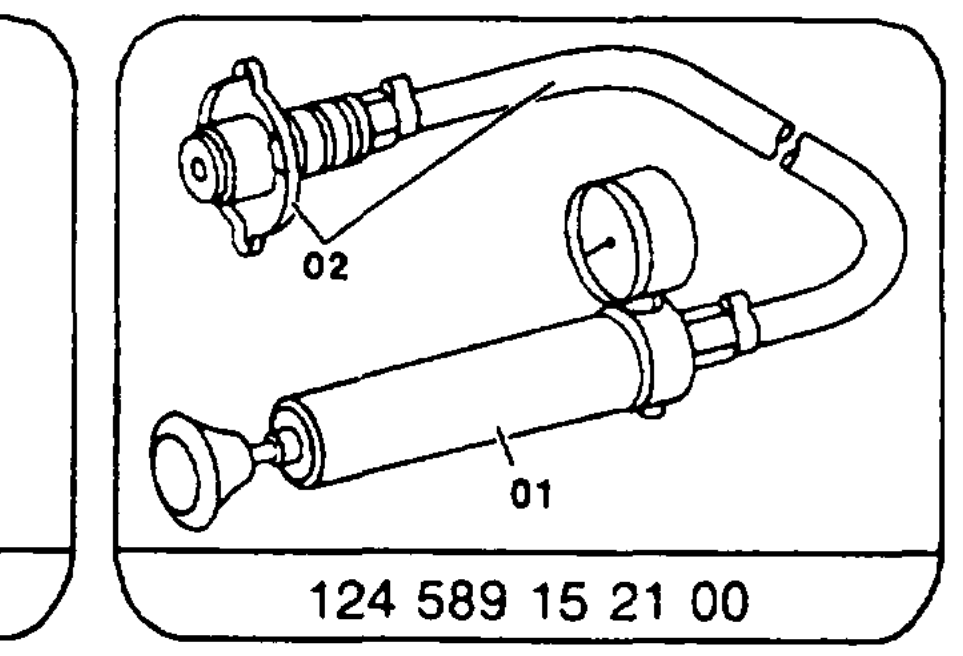
Special tools
\ 000589403700
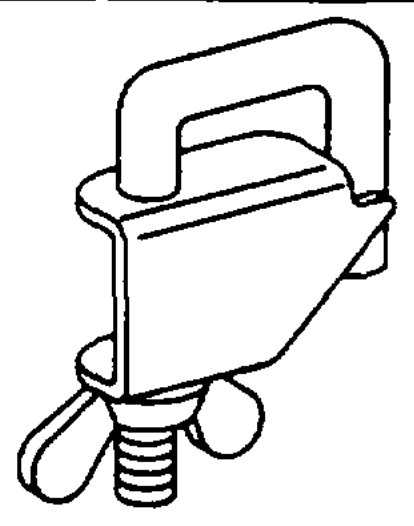
Commercially available tool
7 mm socket wrench insert on flexible shaft eg. Hazet for hose clip with worm drive D-42857 Remscheid Order no. 426–7
Removal, installation
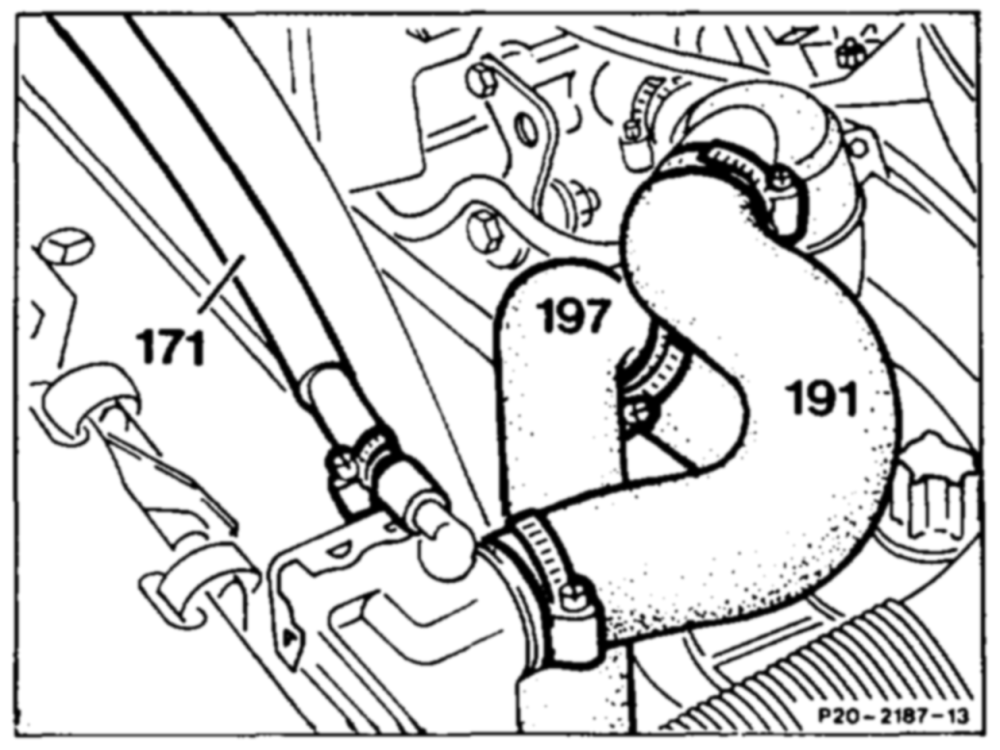
1 Detach coolant hoses (191, 197) at the coolant pump and coolant hose (171) at the radiator.
2 Check connection for overflow hose for signs of damage and leaks; replace if necessary (20-4270).
Model 124
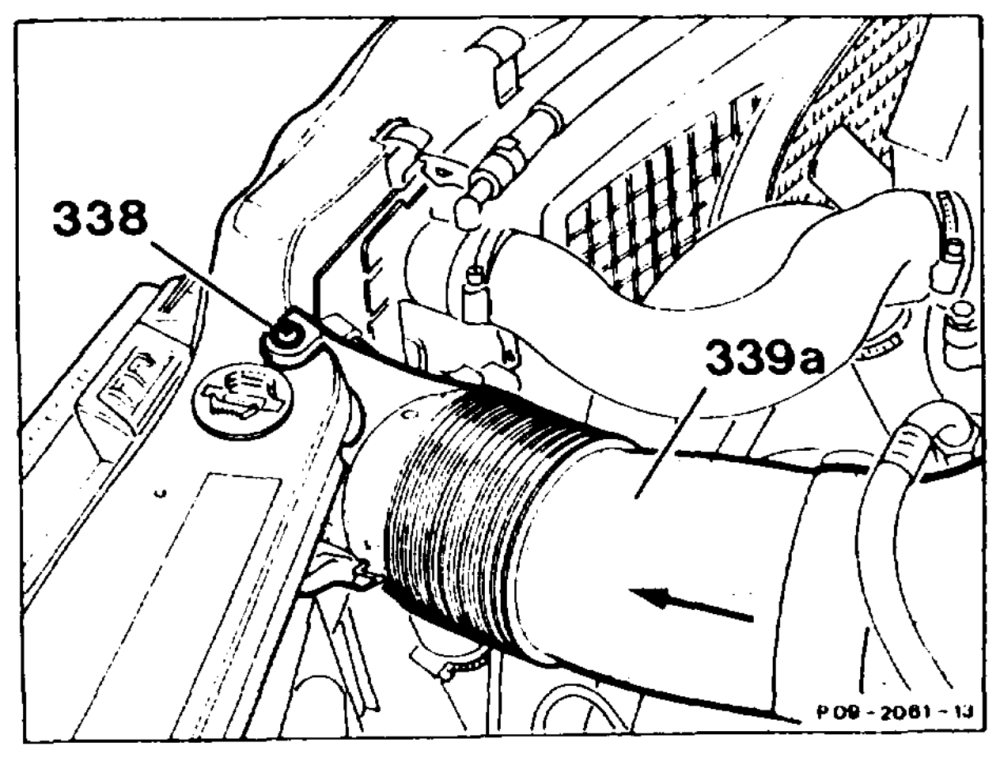
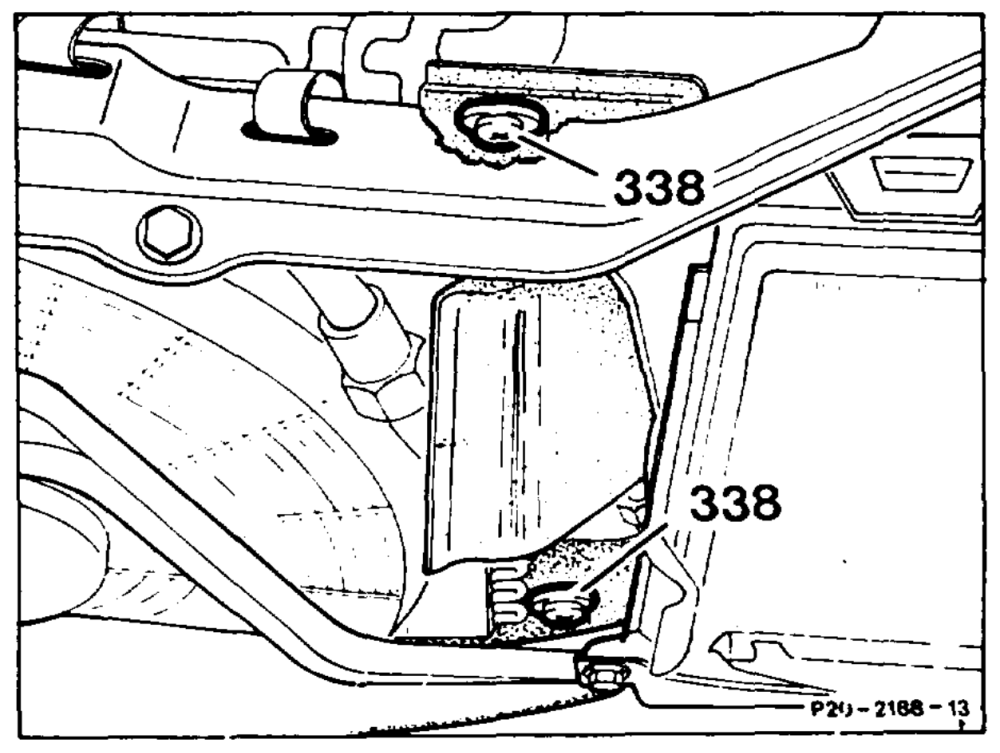
3 Remove screw (338). Detach air scoop (339a) from air filter in direction of arrow and remove.
wae =RA 20 1133-4200/2
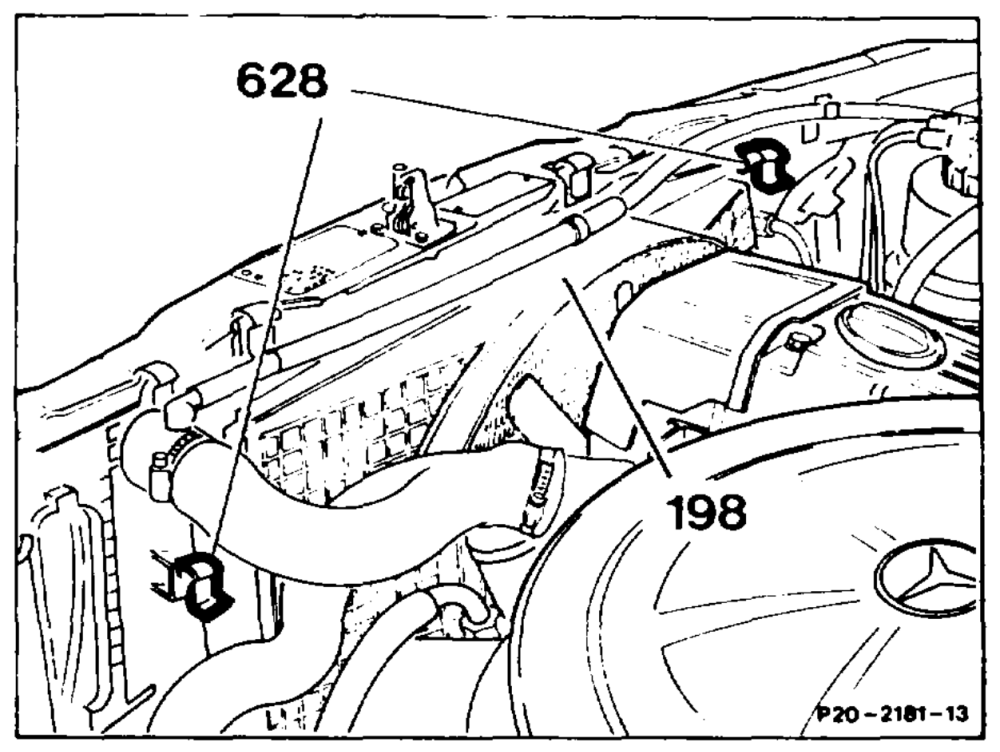
4 Withdraw flat springs (628) upward and raise the fan cowl (198) slightly and place over the fan.
Installation instruction
Introduce catches on the fan cowl into the mount on the radiator.
Shown on model 124
Model 126.025 Gs)
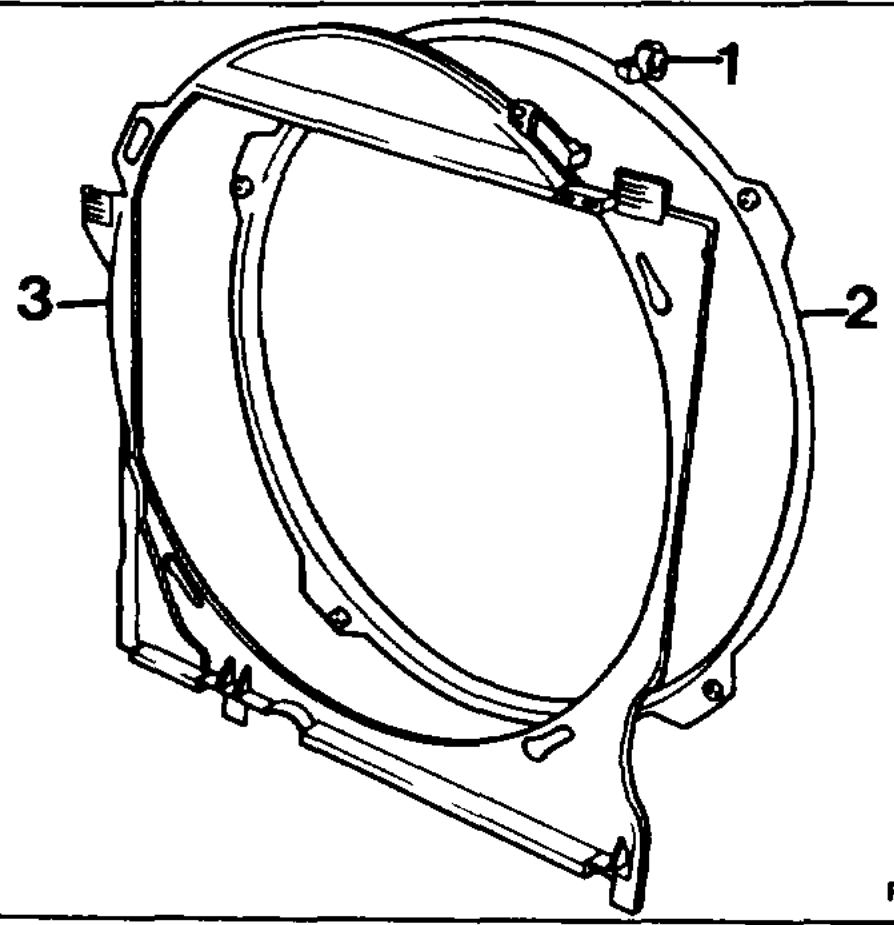
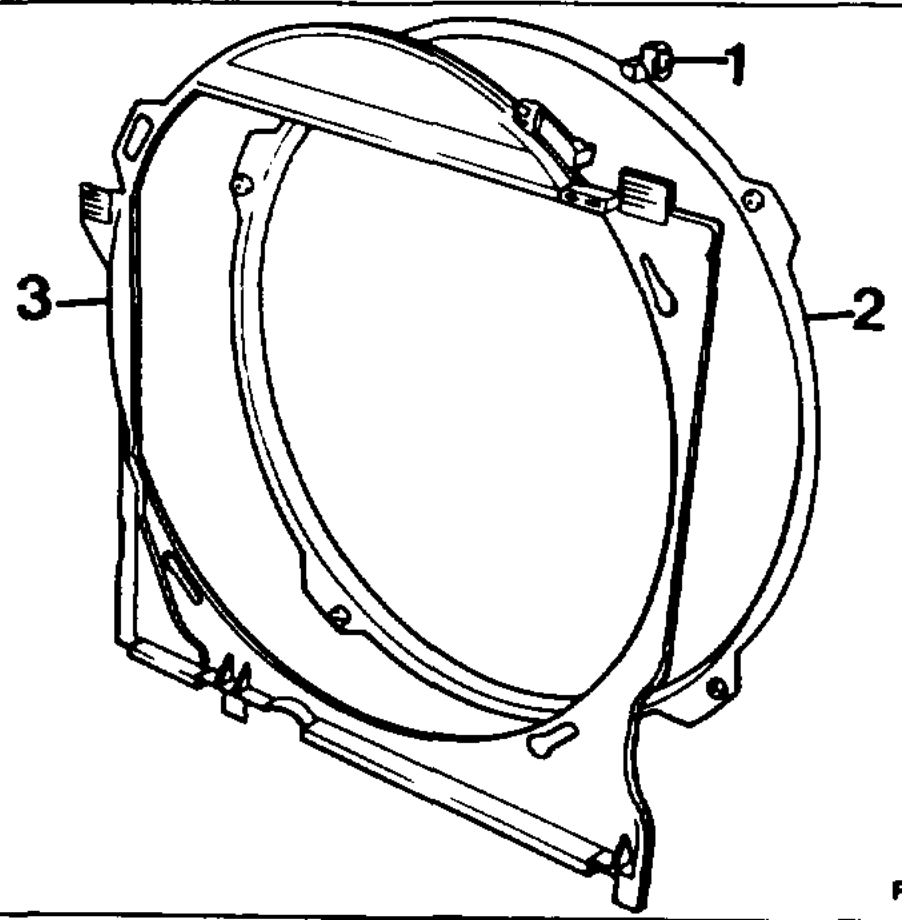
Withdraw locking pin (1) and turn the fan cowl ring (2) to the left and place over the fan. Withdraw flat springs upward and take out the fan shroud (3).
Model 124
5 Remove screws (338) for radiator cover.
Note
If car fitted with automatic transmission: unscrew oil lines at the radiator. Check oil level. Tightening torque 20 Nm (reference value).
Models 124, 126
6 Withdraw flat springs (173) upward and lift the radiator (187) up out of the rubber grommets of the cross bar.
ie RA 20.1133-4200/3
Model 107
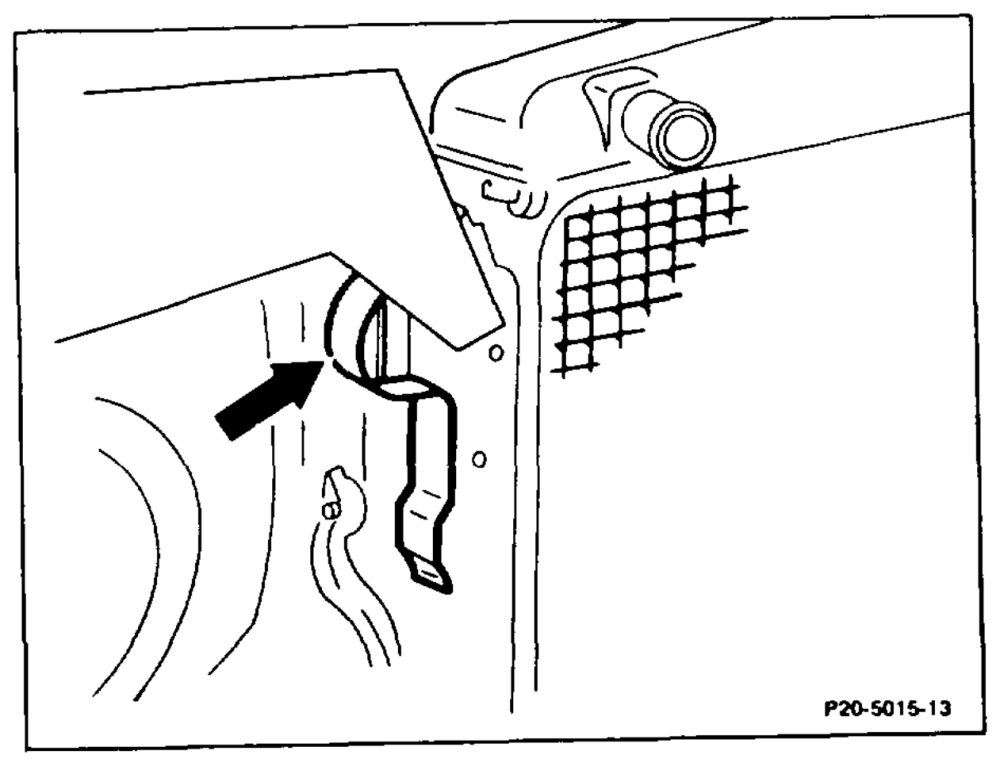
Press left and right spring clamps (arrow) outward and lift the radiator up out of the rubber grommets of the cross bar.
Installation instruction
The mounting studs on the bottom of the radiator must be inserted into the rubber grommets of the cross bar or bracket.
Installation is performed in the reverse order.
7 Test cooling system for leaks (20-0170).
wmite =RA 20 1133-4200/4
Preceding work: Hood raised to vertical position (01-0080). Coolant drained at radialor (20-0100). Bottom engine compartment panel removed (Maintenance Manual Volume 2, Op. no. 6190).
B. Models 129, 201
P20-0012–58
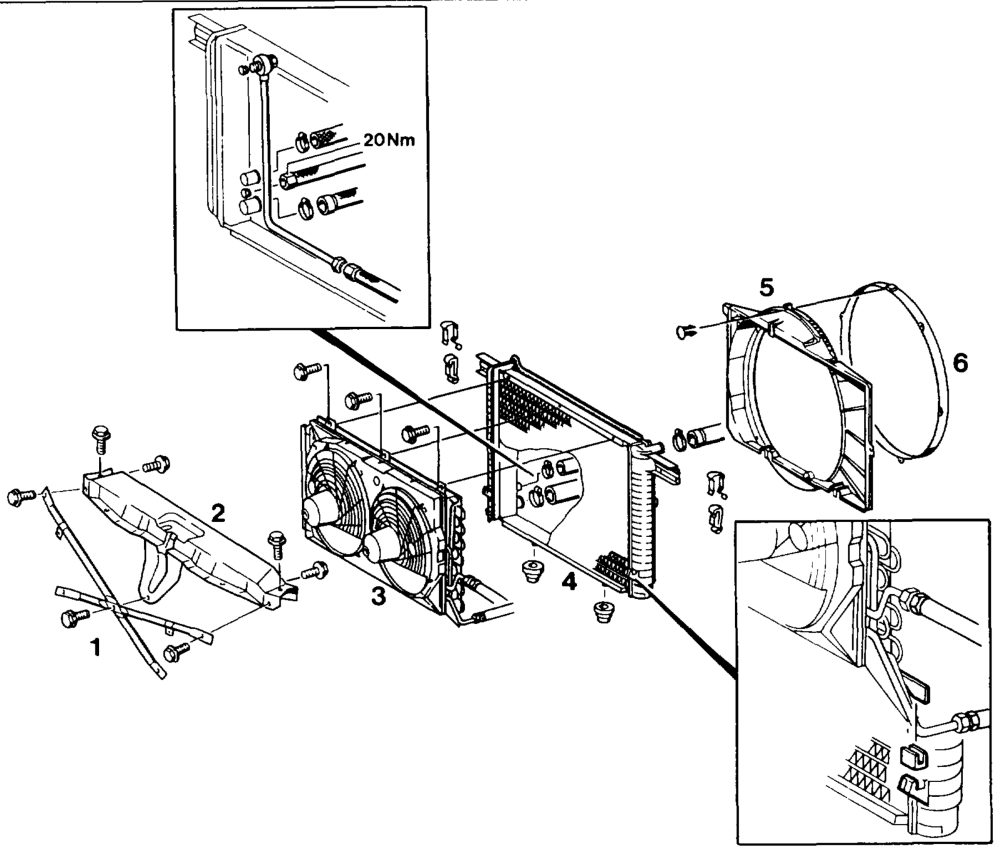
If automatic transmission fitted: unscrew oil lines at radiator, screw on, 20 Nm, (step 1). Coolant hoses detach, attach (step 2). Air scoop (air filter) remove, install (step 3). Fan cowl ring (6) detach, attach (step 4). If air conditioning fitted: strut (1) and transverse support (2) unscrew, screw on (step 5). If air conditioning fitted: bracket for air conditioning line, bottom left, on Model 129 …. . unscrew, screw on (step 6). Front bumper on Model 201 remove, fit on (88-200) (step 7). If air conditioning fitted: condenser (3) unscrew from radiator (4), screw on (step 7).
wae §=RA 20.1133-4200/5
If air conditioning fitted: condensor (3) of air conditioning with auxiliary fans ………… raise, insert (step 8). remove, install (step 9). Radiator (4) with fan shroud (5) Fan cowl (5)… 2… 2.2 ee ee ee eee take off radiator (5), fit on (Step 10). in the reverse order. Installation 2.2… ….0.. 0202.20.02 .000.
If automatic transmission fitted check oil level.
Cooling system 2… 2. eee eee test for leaks (20–0170).
Commercially available tool
7 mm socket wrench insert on flexible shaft eg. Hazet for hose clip with worm drive D-42857 Remscheid Order no. 426–7
Removal, installation
1 If automatic transmission fitted: unscrew oil lines at radiator.
Installation instruction
Tightening torque 20 Nm.
2 Detach coolant hoses at radiator and at the coolant pump.
3 Detach air scoop from air filter.
4 Remove fan cowl ring (2) by withdrawing locking pin (1) and turning the fan cowl ring (2) to the left. Place fan cowl ring on the fan.
Installation instruction
Ensure the four engaging points are correctly located.
P20-2063–13
smite = RA 20.1133-4200/6
5 Unscrew strut, unscrew cross support and place to the side with engine hood cable connected.
Model 129
6 If air conditioning fitted: unscrew bracket for air Conditioning line on bottom left at radiator support.
7 If air conditioning fitted: unscrew condensor from radiator.
Model 201
Remove the front bumper (88-200) before unscrewing the condensor.
8 If air conditioning fitted: raise condensor of air Conditioning system with auxiliary fan.
Model 129
Installation instruction
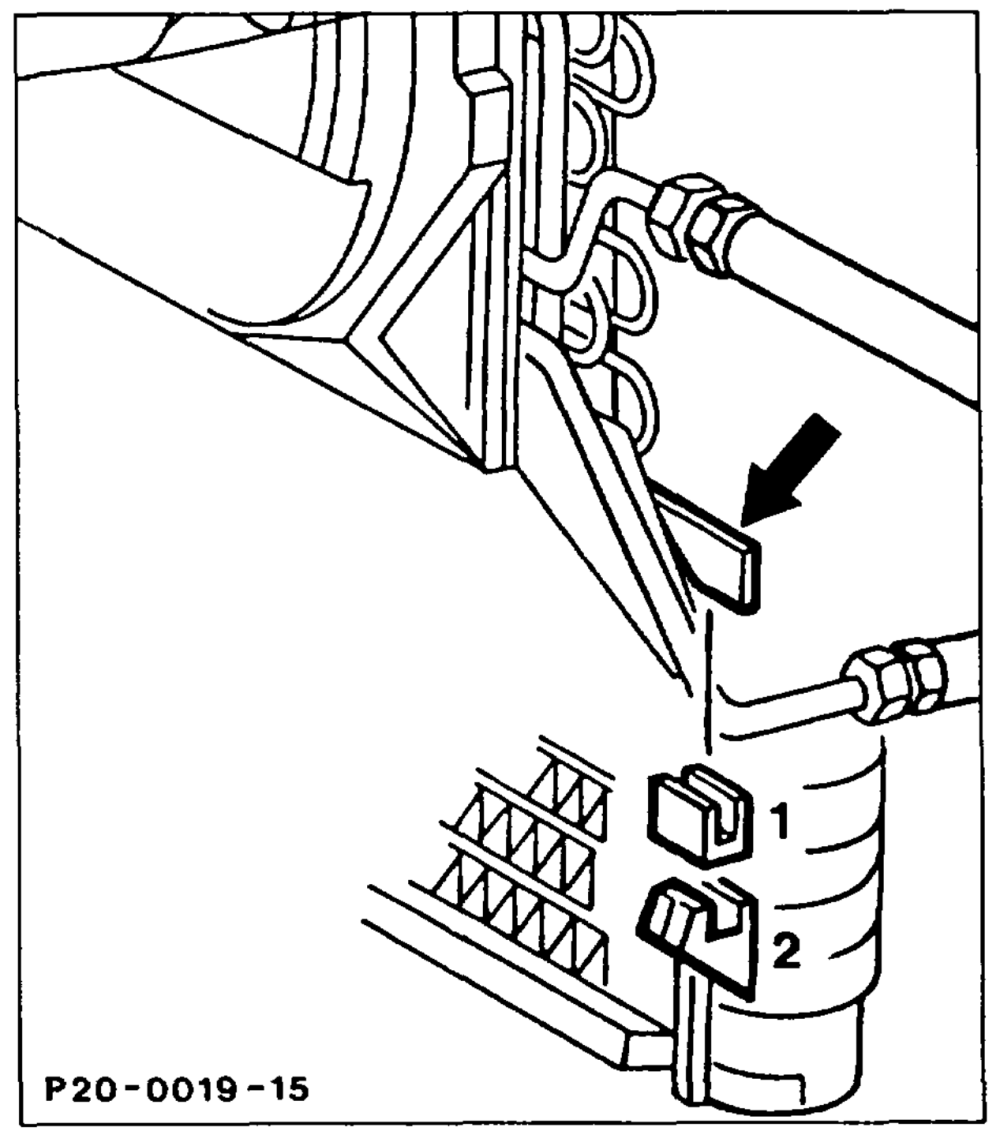
Insert both rubber mounts (1) into the supports (2) on left and right of radiator (stick on). When installing radiator, raise the condensor with auxiliary fans. Introduce bearing points (arrow) into the rubber mounts (1).
9 Withdraw flat springs upward and lift radiator up Out of the rubber grommets of the cross support.
Installation instruction
The mounting studs of the radiator must be introduced into the rubber grommets of the cross support or bracket.
«mite §=RA 20.1133-4200/7
Installation is performed in the reverse order.
11. If automatic transmission fitted: check oil level.
12 Test cooling system for leaks (20-0170).
mie RA 20.1133-4200/8