Removing and installing, adjusting fan shroud
WIS 20-3400
Preceding work: Warning instructions when hood open (01-0085). Bottom front engine compariment panel removed (Maintenance Manual 6190).
Removal, installation
P20 – 5129 – 37
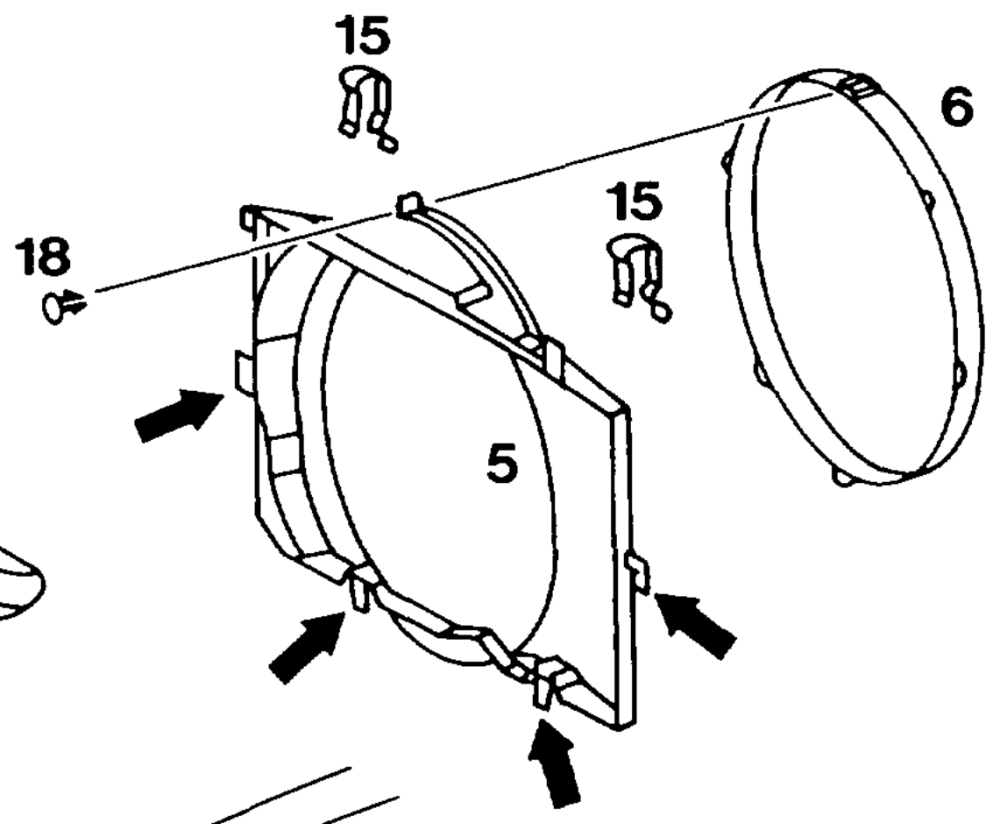
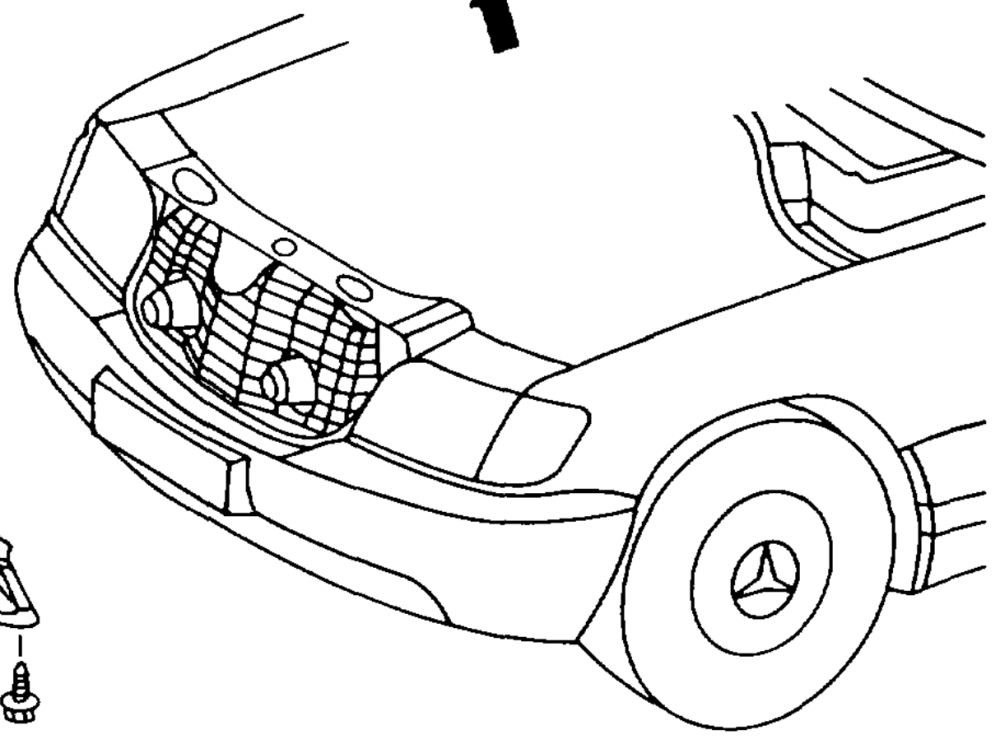
Model 129: top radiator panel (20) ……….. remove, install. \f fan shroud not split version: hose holder at fanshroud 0.000200 a ee unclip, clip in place. For split fan shroud: locking pin (18) ………. remove, install. For split fan shroud: fan shroud ring (6) ……. turn to the left, place over fan, install.
AN When installing, ensure the 4 catches and lugs of the fan shroud ring (6) are properly seated in the fan shroud (5).
wai §=RA 20.1133-3400/1
Flat-shaped springs (15) pull off upward, insert. If fan shroud not split type: viscous fan clutch remove, install (20-3120). Fan shroud or fan shroud (5) and fan shroud ring (6) remove, install.
AN When installing, insert catches (arrows) of fanshroud (5) into the mounts on the radiator.
Adjusting
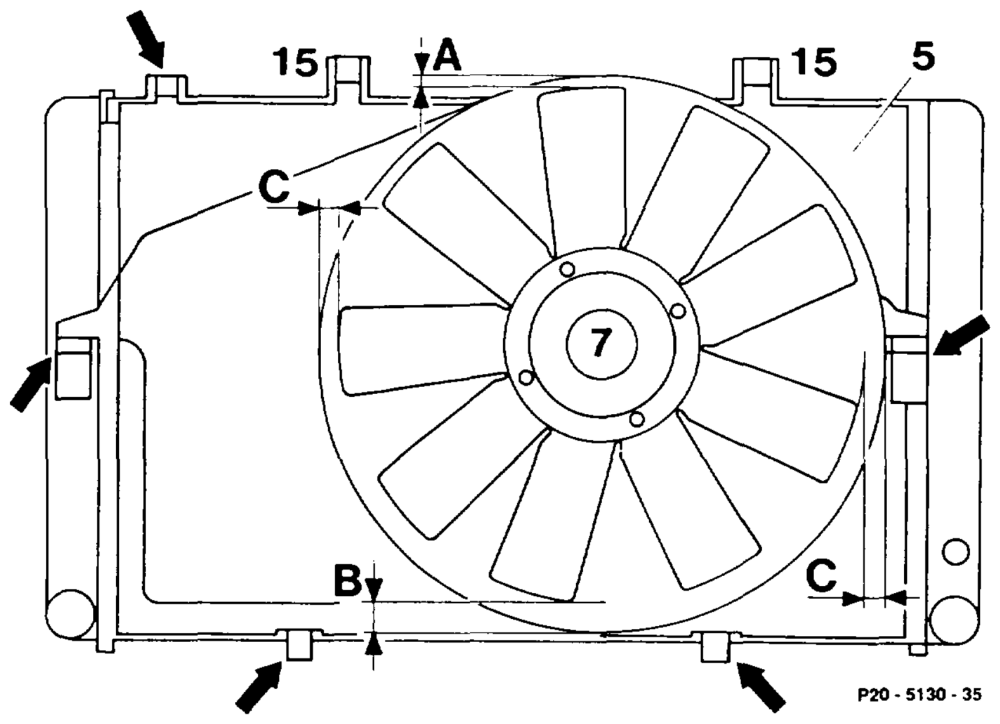
Model 107
A 22mm B 28mm C 20mm
Models 124, 126, 129
A 16.5 – 19.5 mm B 22.5–25.5 mm C 19.5 – 25.5 mm
Model 201
A 15.5 – 18.5 mm B 24.527.5 mm C 18.5 24.5 mm
Flat-shaped springs (15) pull off upward. Fan shroud or fan shroud (5) with fan shroud ring …………–04. adjust relative to fan (7) according to dimensions (A), (B), (C).
AN Model 107, pay attention to note. Flat-shaped springs (15) install.
wae RA 20.1133-3400/2
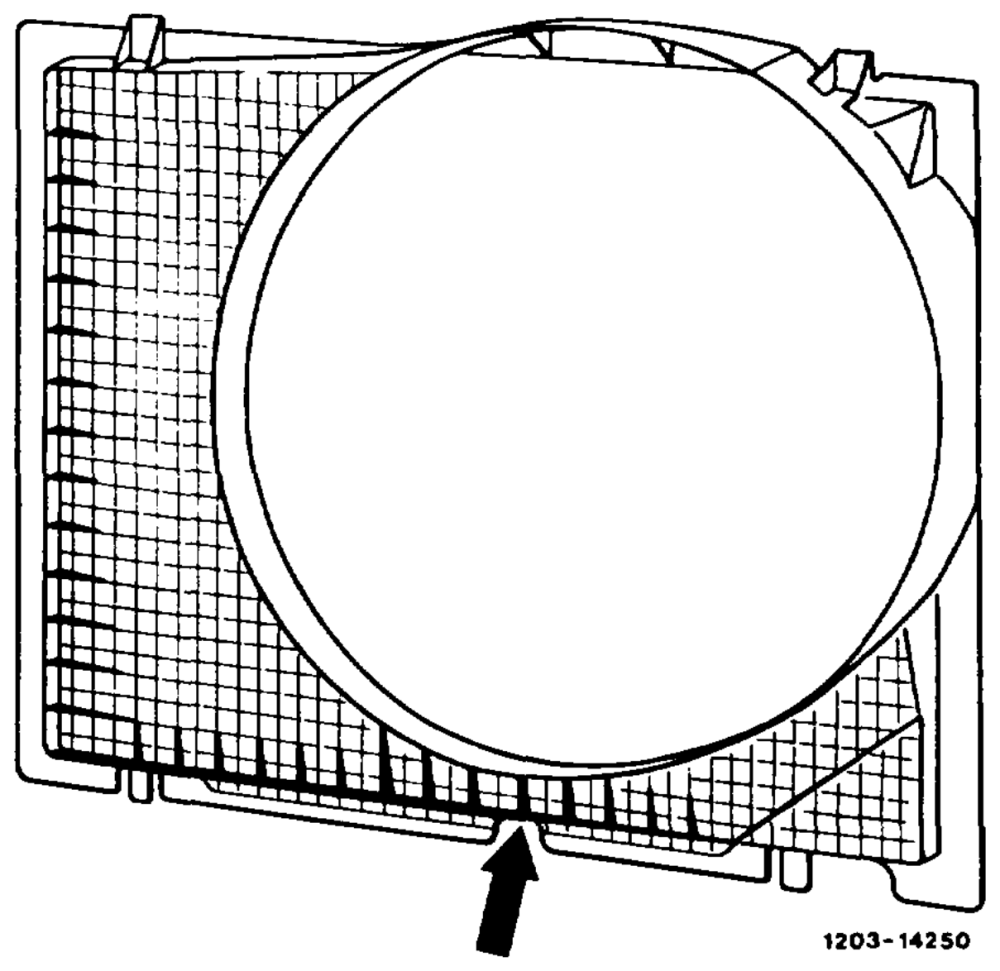
Note A modified fan shroud is installed in model 107 as of vehicle ident end no. 107 041 1A 054 714 with 14 reinforcing ribs at the bottom (arrow). This fan shroud should be installed when performing repairs.
amine §=RA 20.1133-3400/3