Repairing radiator
WIS 20-425
Preceding work: Operation no. of operation texts and operation valucs or standard texts and flat rates… eee eee 20-3992 Radiator removed (20-420)
P20 – 0071–35
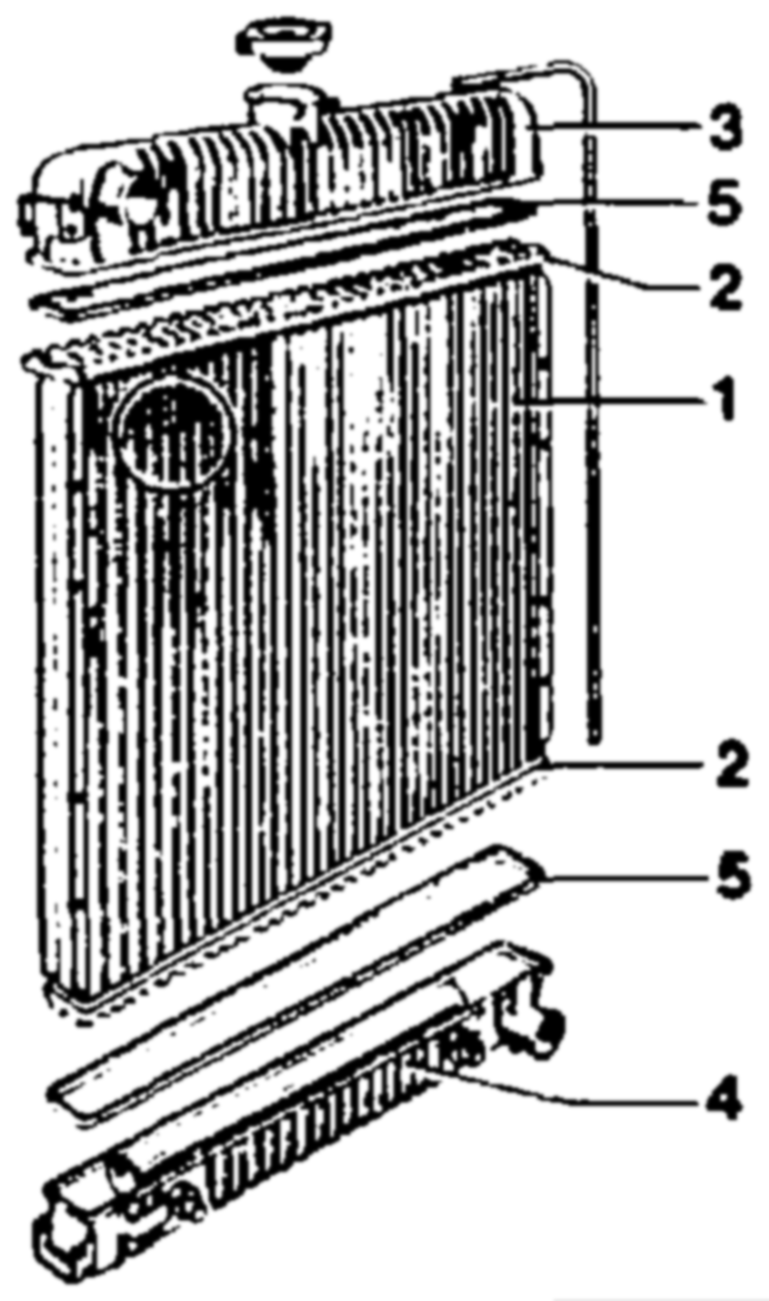
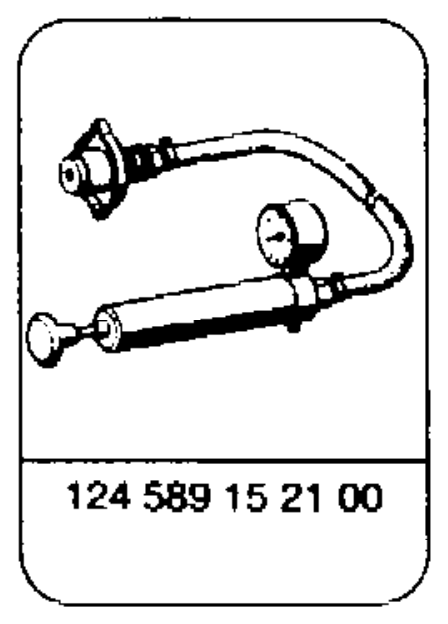
Radiator honeycomb (1) …………..005. check for signs of damage. clean and seal hose connections and oil cooler Radiator 2.0… cee ce eee eee line (steps 1 – 4). pressure-test with tester 124 589 15 21 00 and Radiator 2… 0… 0… cee eee ee eee 605 589 00 25 00 in water bath, mark leak point, reduce pressure and blow-dry radiator with compressed air (steps 5 ~ 10). Top and bottom water tanks (3, 4) ……….. check for leaks. Gasket (5) 2.2… 2 eee check for leaks. seal leak point with repair kit radiator sealant Radiator 0.0… ce eee eee eee 123 989 00 20 (steps 11 – 15).
LN Pay attention to safety instructions!
whim §=RA 20.1044-425/1
Radiator 2… 2… eee pressure-test at 1.4 bar gauge pressure in water bath, check for leaks (steps 16 — 17). Radiator 00-0022 eee eee eee install (20-420). Cooling system… eee eee check for leaks (20-017).
Sealant
Repair kit radiator sealing 123 989 00 20
Special tool
Commercially available tools and testers
Designation e. g. make, order no. Hexagon bit for wrench on flexible shaft Hazet @ 6 mm 426–6 with worm drive 42853 Remscheid @ 7mm 426–7
Shop-made tool
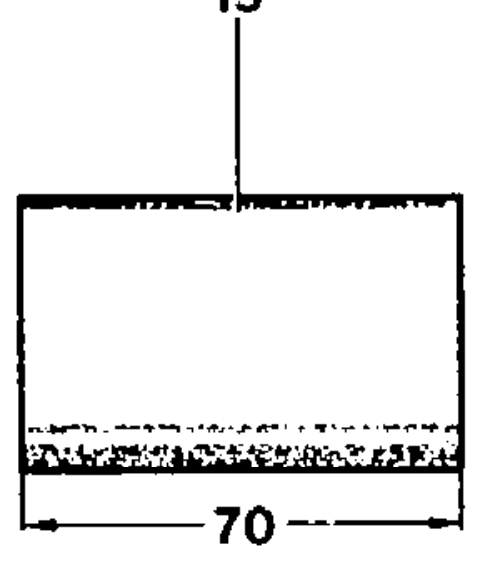
15 16
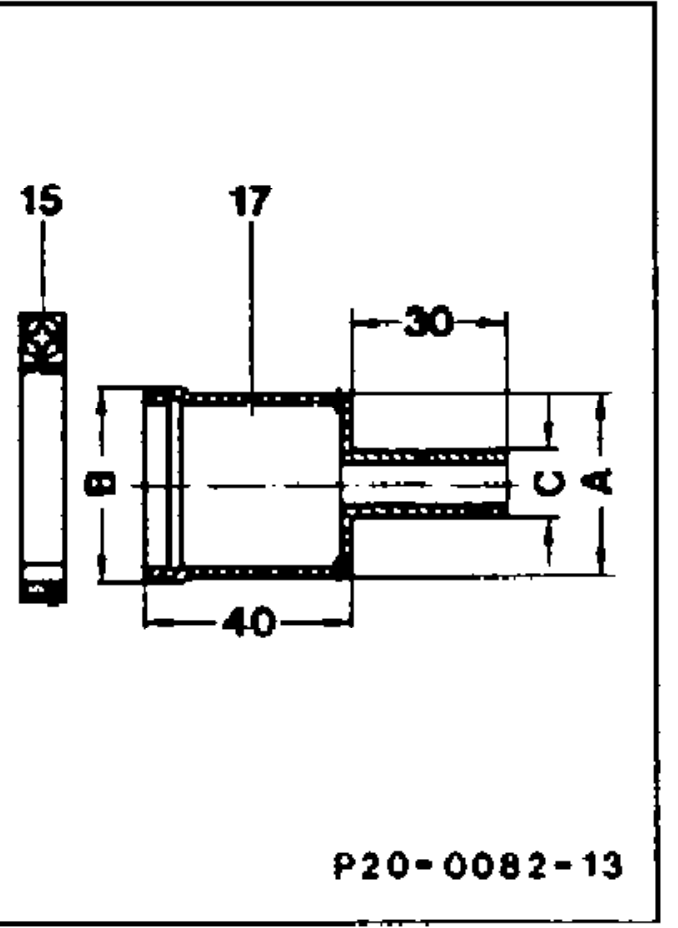
Cap for top hose connection: _ .
15 2 clips L 36–46, part no. 916026 036000
16 Piece of hose, part no. 201 501 38 82 17. Reducer made trom two tubes az A 35mm @ 70 B 39mm@ C 12mm
elim §=RA 20.1044-425/2
Shop-made tool
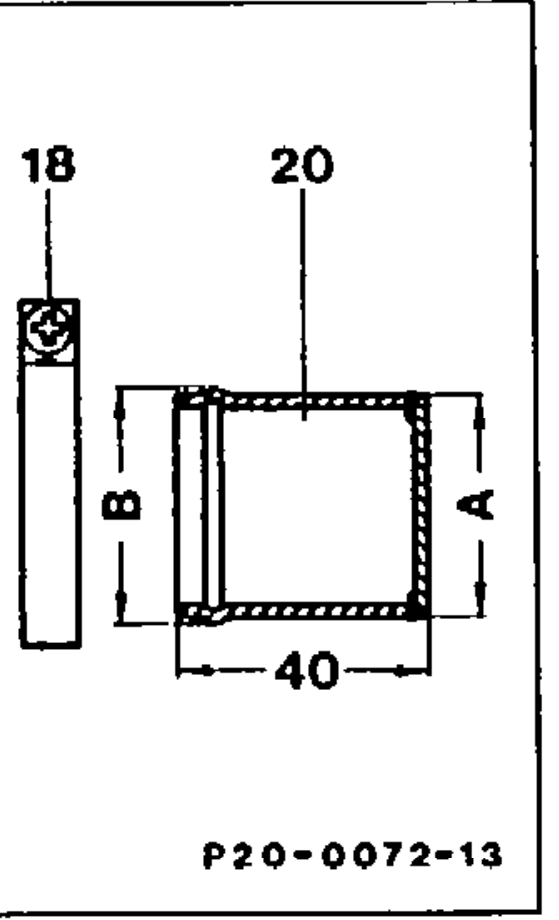
18 19
Cap for bottom hose connection:
18 2 clips L 36–46, part no. 916026 036000
19 Piece of hose, part no. 201 501 38 82
20 Cap from a tube bs A 35mm@ B 39mm oO
| Designation | Use |
| Priming liquid | Preparation of base |
| Undiluted sealant | For properly sealing accessible points |
| Diluted sealant | For sealing difficult-to-reach points (e. g. sides of cooling tubes) |
Sealant and priming liquid have a storage life of approx. 1 year provided they are always sealed airtight after use.
Priming liquid which has become cloudy should no longer be used.
The following parts or points in the coolant circuit can be sealed with the sealant:
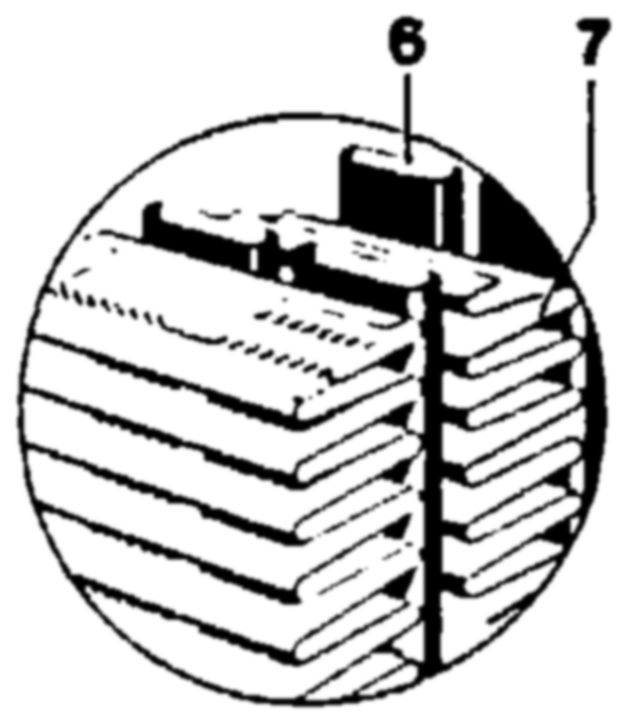
Plastic water tanks (3 and 4). Heavy metal water tanks (holes up to 1.5mm Light and heavy metal cooling tubes (6). Tube plate (2). Beaded collar (connecting point between radiator honeycomb and water tank). Heat exchanger of heating system.
atime §=RA 20.1044-425/3
Fractured or cracked fastening straps, cracks at the connection fittings or spalling cannot be repaired.
Brazing or soldering on heavy metal radiators with plastic water tanks may only be performed on the honeycomb (1) if a distance of at least 20 mm is maintained to the water tank otherwise the high brazing/soldering temperature will damage the gasket (5) and the water tank (3 and 4). Leaks which are located closer to the water tank should be sealed only with sealant.
The radiator does not to be removed for sealing. In this case, it is sufficient to drain the coolant and to pressure-test the cooling system with the tester (approx. 1.4 bar gauge pressure) after sealing.
LN Light alloy radiators with plastic water tanks cannot be repaired by brazing/soldering.
Sealant is available in diluted and undiluted form because of the different accessibility at the radiator (e. g. more difficult in the honeycomb than at the water tank).
The different sealant versions and the priming liquid are combined in a repair kit part no. 123 989 00 20.
whiten §=RA 20.1044-425/4
The priming liquid is easily combustible (pay attention to Safety Instructions, Hazards Class A 1).
Acetic acid is released until the sealant has completely cross-linked (cured). For this reason, avoid contact with skin. Clean affected parts immediately with water and soap. Rinse out eyes with water. Consult a doctor if necessary.
Sealing
1 If the leakage point cannot be properly located with the radiator installed, remove radiator (20-420).
2 Clean radiator.
3 Seal hose connections with the shop-made caps.
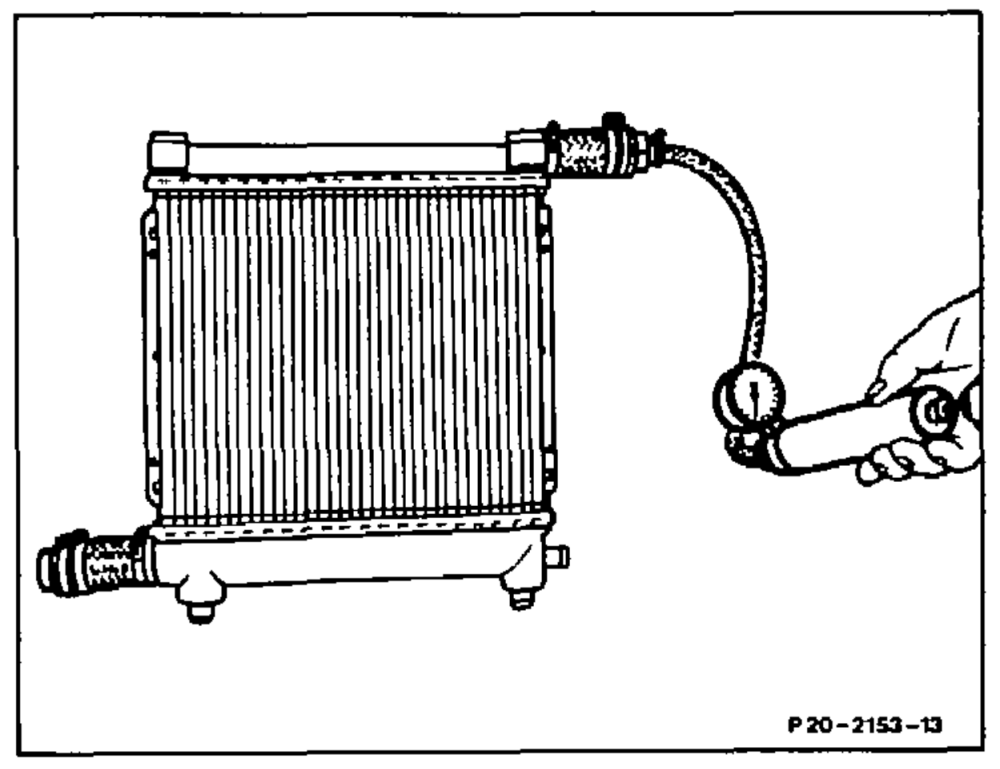
4 Seal connections of the transmission oil cooler with plastic caps or plugs from old oil cooler lines. Cut off the oil cooler lines just behind the nipple and solder on, to perform this step.
5 Connect testers 124 589 15 21 00, 605 589 00 25 00 to the radiator.
6 Place radiator in a water bath. :
7 Pressurize radiator with the tester and check where air bubbles rise up.
8 Mark leakage points.
9 Remove radiator and reduce pressure.
aii §=RA 20.1044-425/5
with a commercial cleaning agent (e. g. tri or white spirit).
It is not necessary to remove the paint. The radiator should then be blown-dry at the affected point with compressed air.
There must not be any dust or grease residues left.
12 Apply a very thin and even coat of priming liquid with a brush.
Apply the priming liquid not only at but also around the point to be sealed. Pour the quantity of priming liquid required for the repair in a separate vessel to avoid the priming liquid in the can being polluted.
AN Pay attention to safety instructions!
13 Allow priming liquid to dry for approx. 10 minutes at room temperature.
14 Apply diluted or undiluted sealant according to accessibility. Use brush, spatula or similar for spreading the sealant.
lie RA 20.1044-425/6
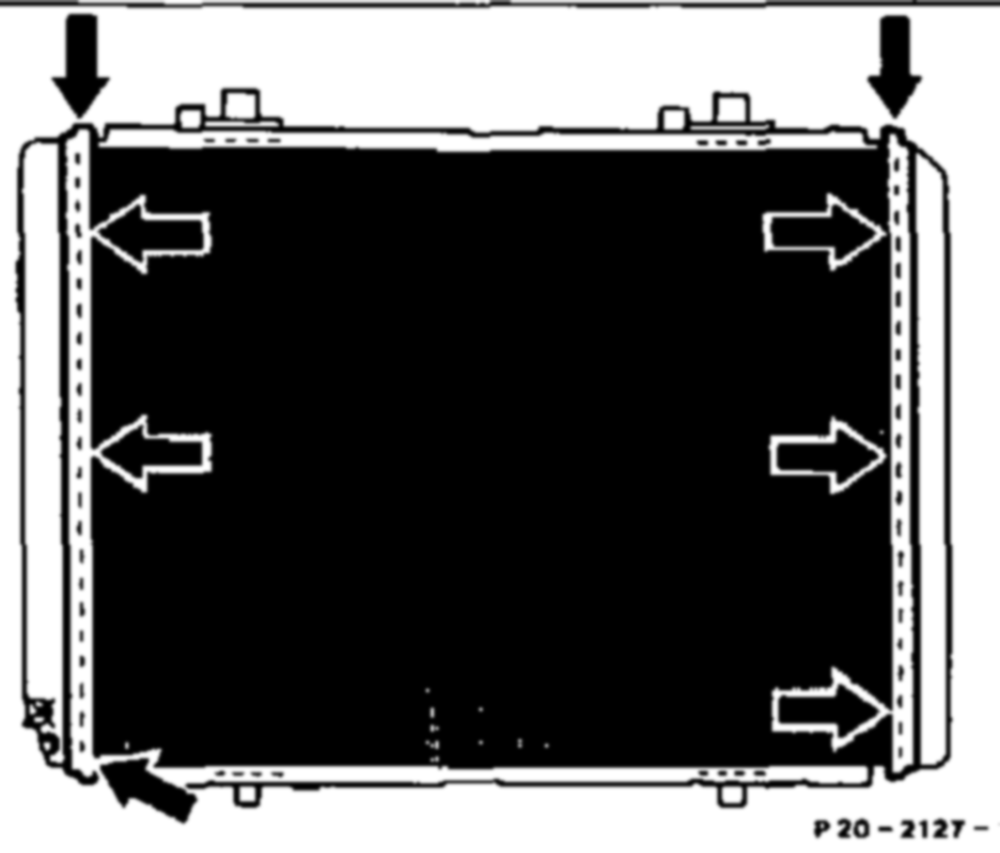
When applying and spreading sealant, ensure that no air is entrapped.
In the same way as for cleaning and priming, apply the sealant not only at the point to be sealed but also around it. If there are several leak points at the beaded collar (arrows) it is recommended to seal the beaded collar all round.
Seal leaks in the honeycomb from both sides, 13
After completing the sealing procedure, close tube immediately. Acetic acid is released until the sealant has completely cross-linked. Avoid contact with skin. Clean afftected points immediately with water and soap. Rinse out eyes with water. Contact a doctor if necessary.
15 Leave radiator upright or placed down for at least 3 hours for the sealant to dry. Depending on the quantity of sealant applied and the size of the point treated, it may take up to 24 hours for the sealant to cure to form a permanent elastic joint at room temperature.
16 Pressure-test radiator for approx. 5 minutes in a water bath at 1.4 bar gauge pressure.
Should there still be leaks, repeat sealing operation as from step 8.
17 Remove testers and plugs.
18 Install radiator (20-420).
19 Check cooling system for leaks (20-017).