Removing and installing high voltage distributor
WIS 15-535
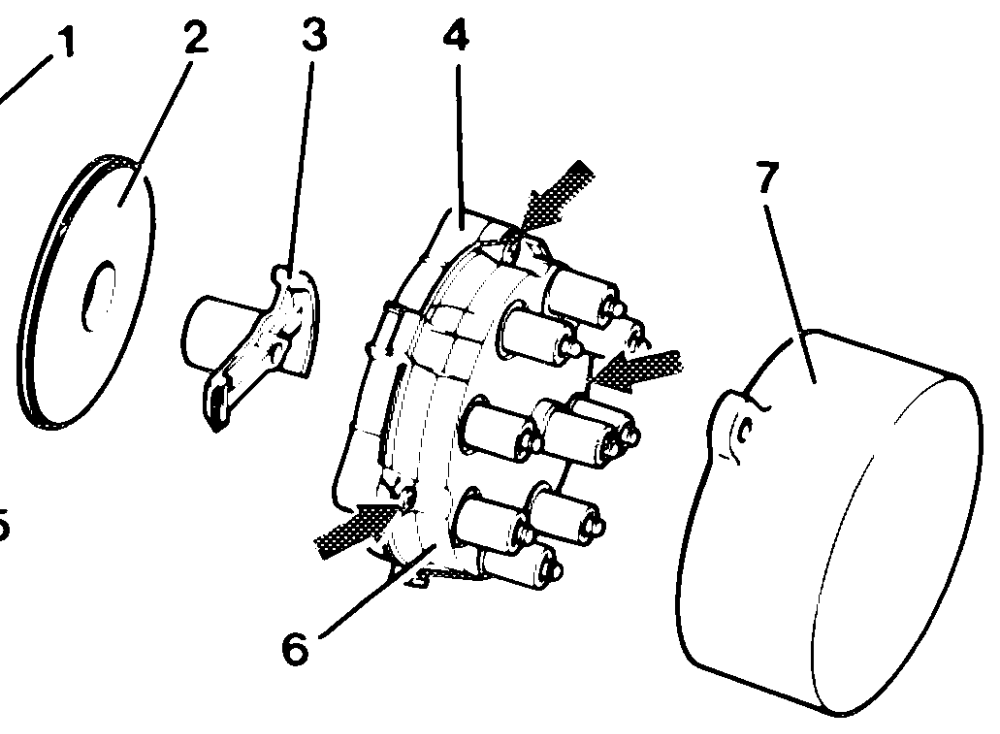
Cover (7) on high voltage distributor ………. after opening clips, remove from distributor cap, fit on.
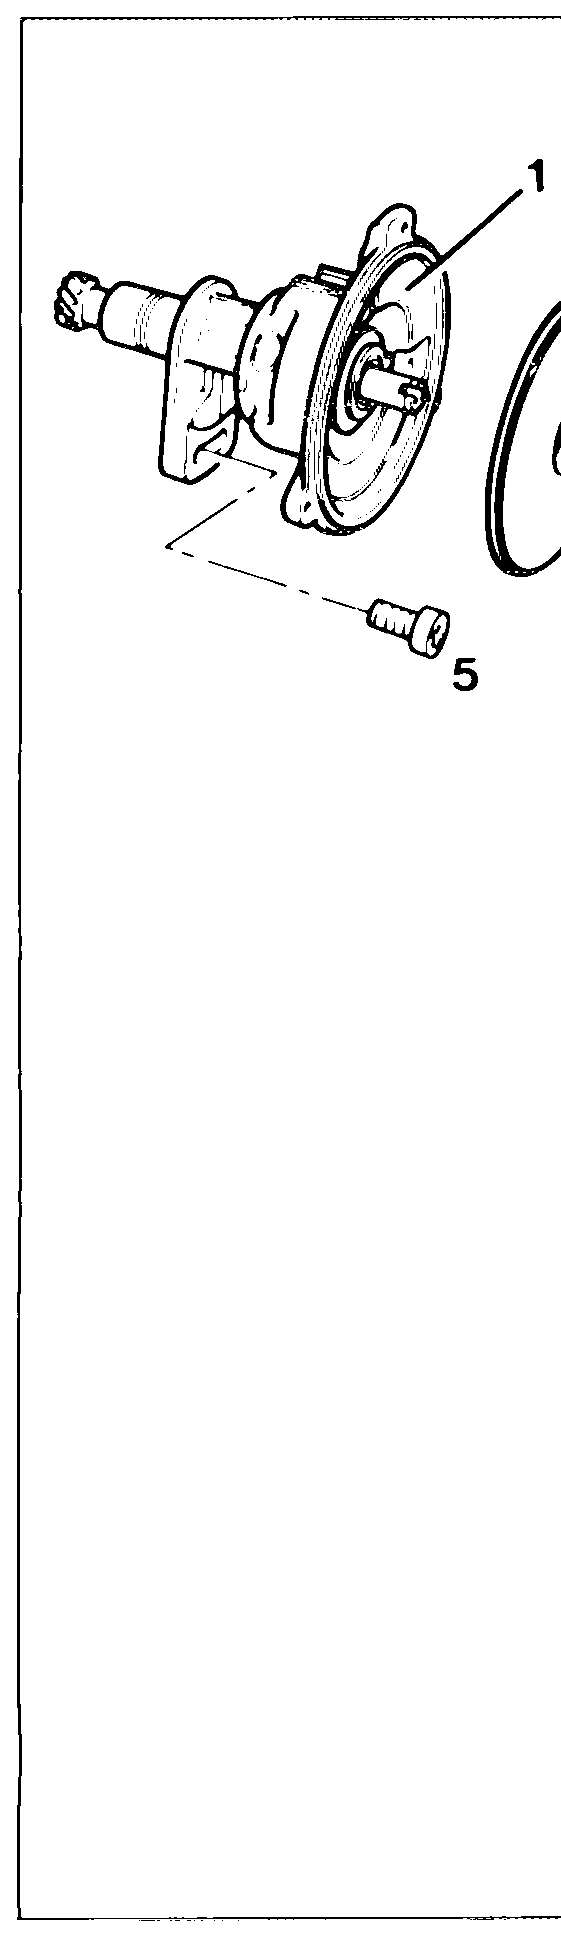
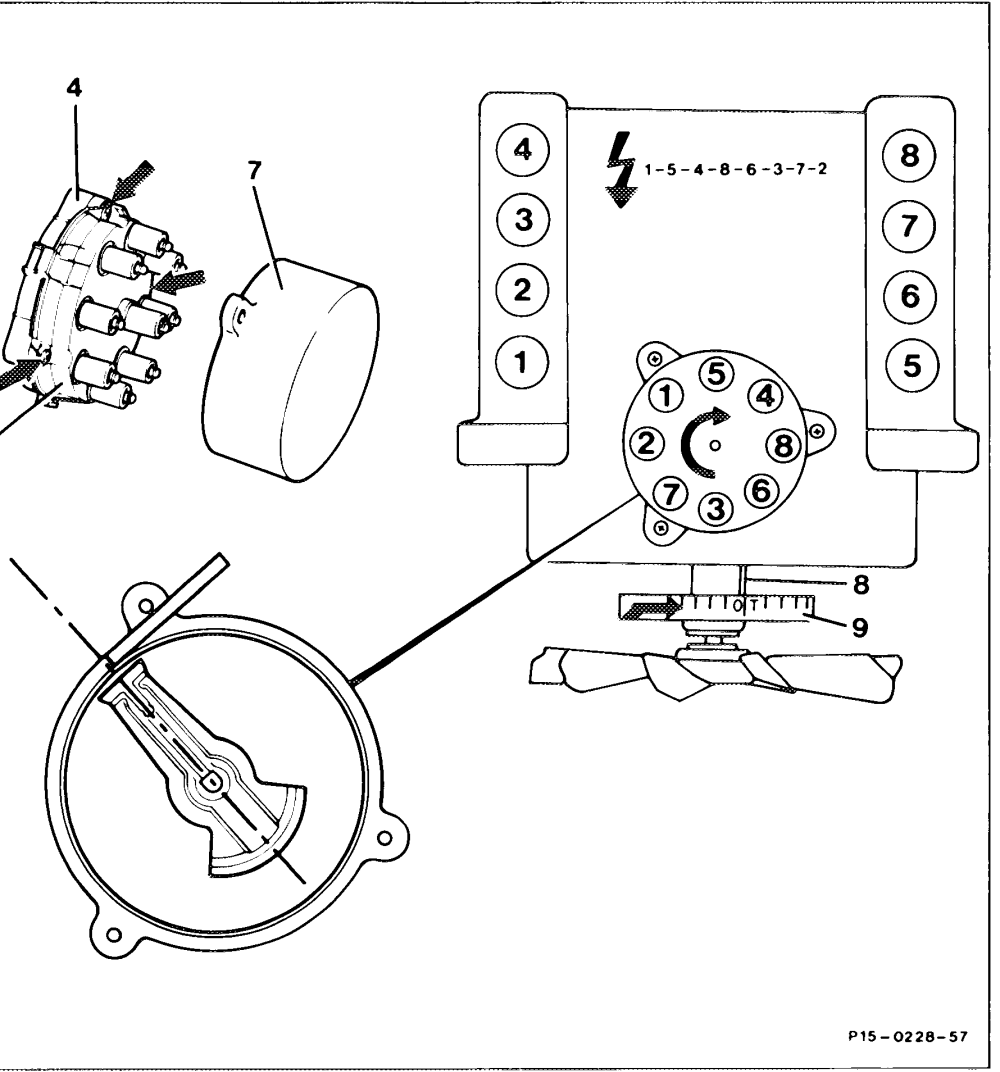
Distributor cap (4) 02… ee eee eee unscrew, screw on (arrows). Remove together with protective cap for remote interference suppression (6), fit on. Position engine to ignition TDC of No.1 cylinder this is done by aligning markings on distributor rotor (3) and distributor housing (1). In addition, pointer (8) on timing case cover must be positioned above TDC mark of vibration damper (9). Sealing disc (2) and distributor rotor (3) ……. remove from distributor. Screw (5) 2… ee eee slacken. Remove distributor.
aligning pointer (8) on timing case cover exactly on TDC mark of vibration damper. fit onto distributor. Align distributor rotor to Sealing disc (2) and distributor rotor (3) marking on distributor housing. Insert distributor. fit on 90° angle to notch in distributor housing Align distributor edge. Align the markings on distributor rotor and distributor housing very exactly to each other.
AN When aligning, press distributor rotor slightly in direction of rotation to eliminate any backlash. tighten
Commercial tool
90° angle
Note It is not possible to set the ignition timing by If the engine was rotated when the distributor turning the high voltage distributor. The ignition was removed, check ignition TDC of No. 1 timing is determined by the EZL/AKR control cylinder as follows: In ignition TDC the rocker arms at No. 1 unit. cylinder are relieved (remove oil filler cap). The centrifugal force-dependent rotor advance in the high voltage distributor does, however, require precisely matching the distributor rotor to the marking on the distributor housing in order to eliminate spark discharges into the wrong cylinder.