Replacing and riveting timing chain
WIS 05-3200
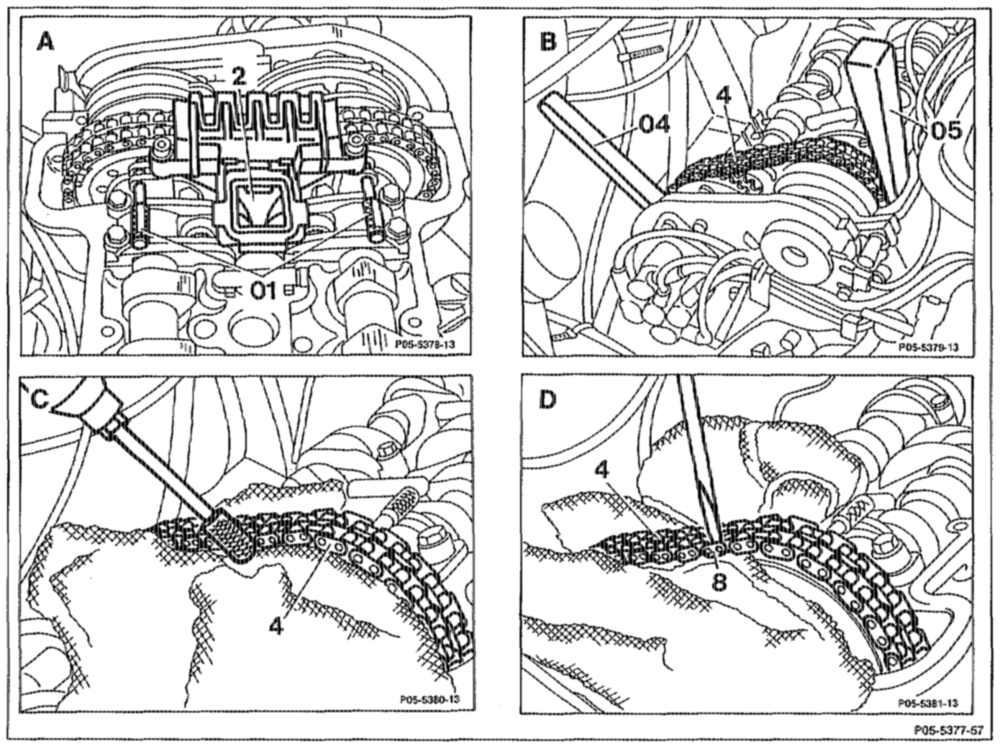
Preceding work: Operation no. of operation texts and work units or standard texts Cylinder head covers removed (01-0500). and flat rates Viscous fan clutch removed (20-3120). 05-7601 Spark plugs removed (15-1031).
Piston of cylinder 1 …. see e ee eee see eee set to 45° before ignition TDC. Right cylinder head: inlet, exhaust camshafts … — fix with pins (01) (Fig. A), special tool 111 589 01 15 00. Chain tensioner see wee ee eee remove (05-3100). Right guide rail (2) attop 2… eee eee eee . remove, install (05-3350) (Fig. A). Tirning chain to camshaft sprockets …. wees lack with wedges (04) and (05) at right cylinder head (Fig. B), special tool 110 589 03 59 00. Chain housing ce rene ee ween cover over with clean cloth. Chain pin of timing chain (4) between inlet and exhaust carnshaft sprockets ………… gtind open (Fig. C). Plate (8) of timing chain (4) 2.0… 62… ee eee prise off with a screwdriver (Fig. D). Ground-open double link …….0. 0.05. e eee push out.
tie RA 05.1322-3200/1
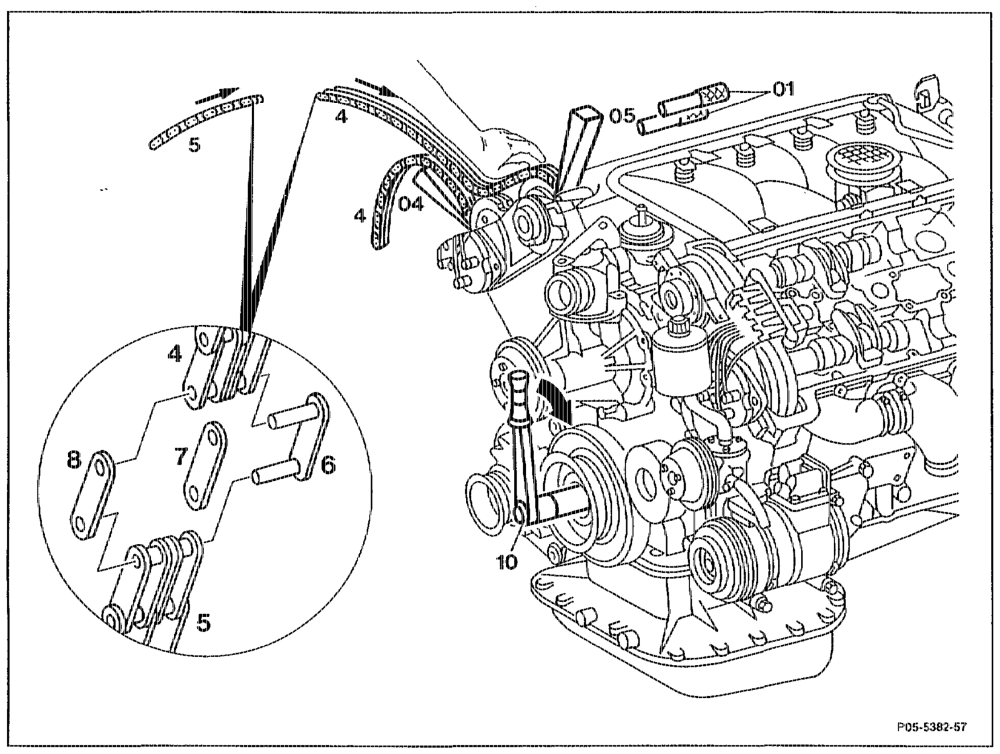
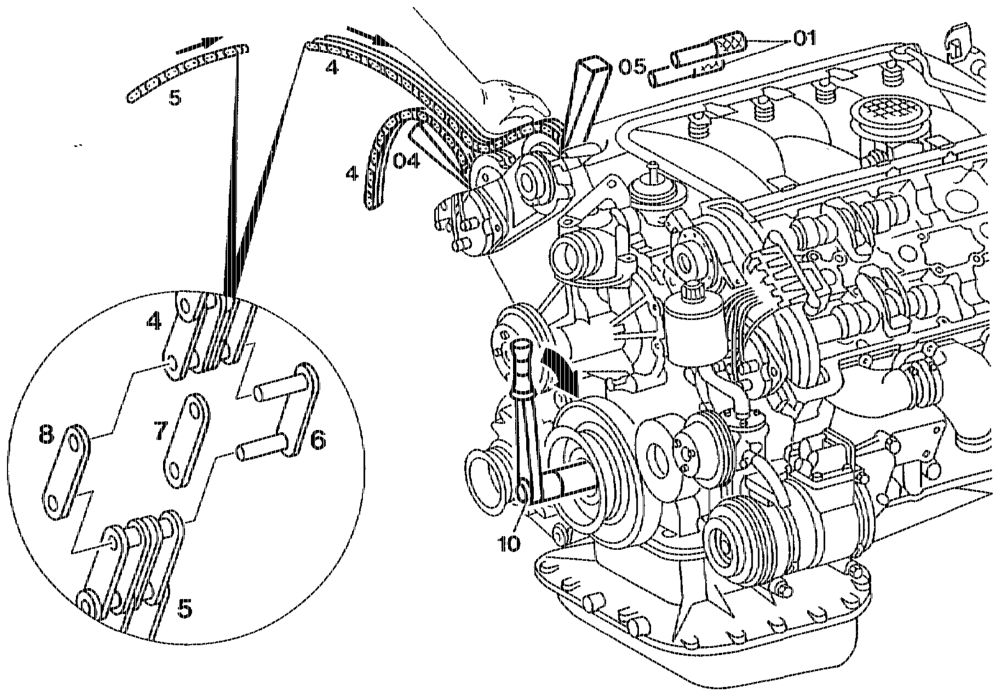
New timing chain (5) …. see teem eee wanes connect to old timing chain (4) with riveted link (6) and middle plate (7) (thickness 1.6 mm) and ground open outer plate (8). Pins (01) ……-. seen e ee eee eee eee eee. remove. Wedge (5) at inlet camshaft ……….. ote remove, holding timing chain meshed at inlet and exhaust camshaft sprockets by hand when performing this step. Wedge (04) at exhaust camshaft sprocket ….. . Slacken slightly. Crankshaft ……. see ee ee eee rotate in direction of rotation of engine with wrench socket (10); hold timing chain (4) or (5) meshed at inlet and exhaust camshaft sprockets when performing this step.
AN Ensure that timing chain (4) or (5) does not jump off when turned. New timing chain (6) 2.2… 0.0… eee eee pull in. End (4) of timing chain which has become free .. — pull out of chain housing. Crankshaft …………. vee eee eee -. rotate sufficiently until the ends of the new timing chain (5) can be connected with the riveted link.
wth. RA 05.1322-3200/2
Timing chain to camshaft sprockets ………. fix with wedges (04) and (05). New timing chain (5) 2… 0.0… 2… 00 eee connect with link (6) and center plate (7).
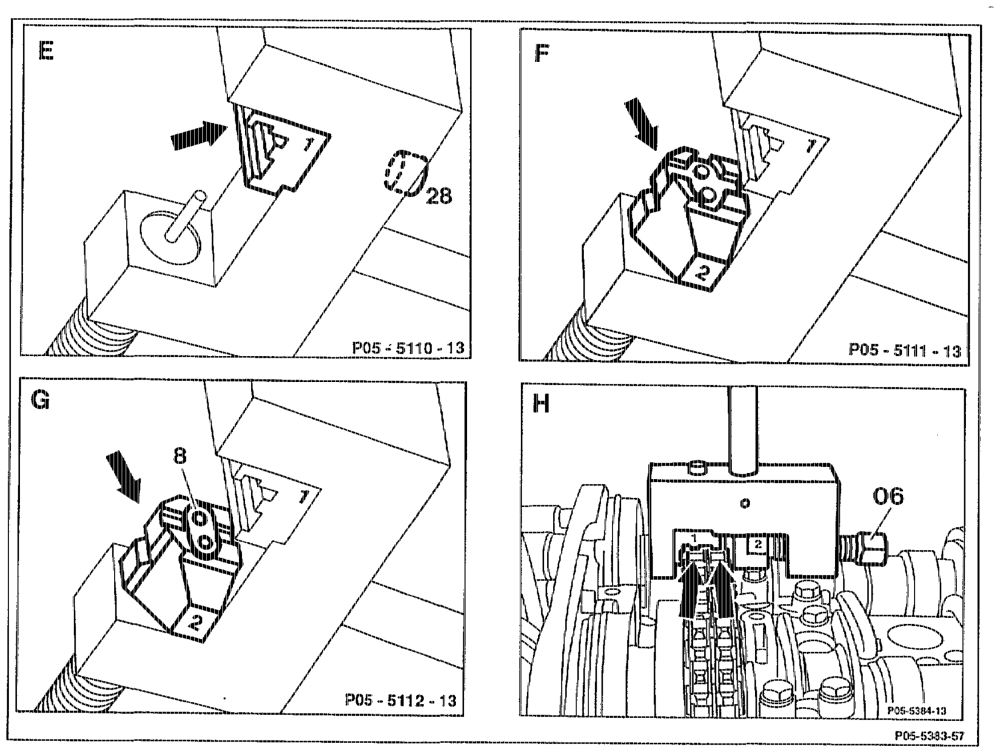
Jaws for duplex roller chain with number 1 ….. insert into fitting tool and screw on with screw (28) (Fig. E). Moving thrust piece (arrow) for sirnplex roller chain with number 2 ……….. ween insert into fitting tool (Fig. F). Outer plate (8) (thickness 1.2mm) ……… .. insert into moving thrust piece (Fig. Gi). Webs (arrowS) 0… ee ce ee eee eee fit onto roller at riveted link. Spindle (06) 2.2.0.0… eee eee eee .. screw in until tight resistance.
Note When screwing in, ensure that the pins of the riveted link are inserted into the holes of the outer plate (8). Insertion tool ……. seen eee remove.
onthe RA 05,1922-3200/3
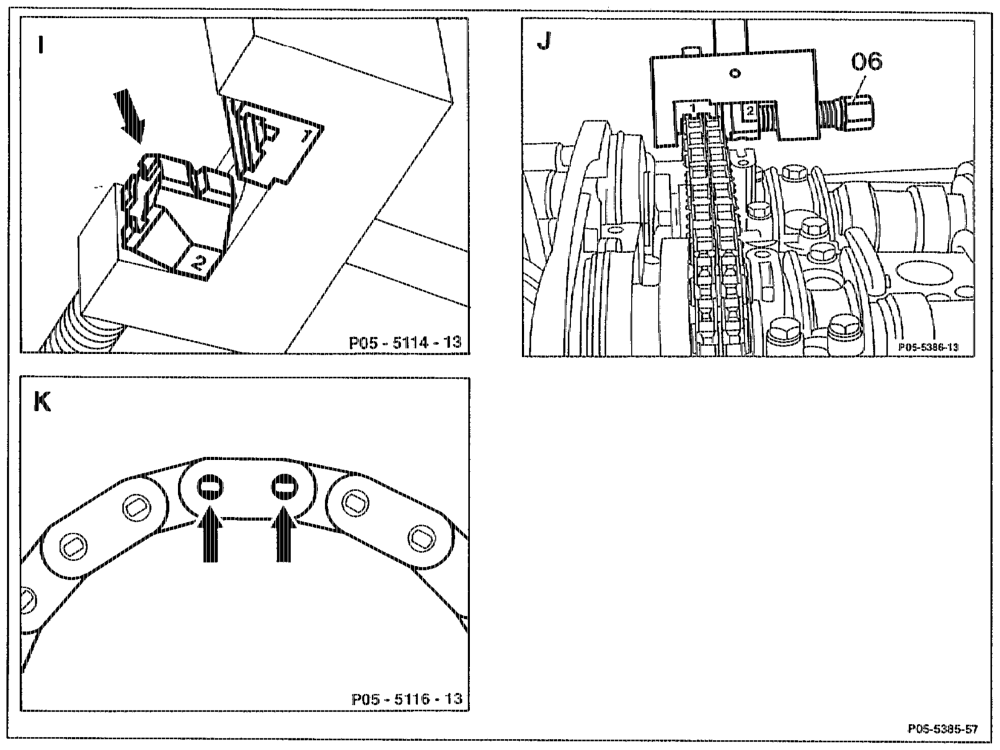
Moving thrust piece (arrow) with number 2 ….. — turn over (riveted section) (Fig. |}. Fitting tool 0… cece eee eee teeta ten position exactly over center of pin (Fig. J). Spindle (06) 2.0… eee ee eee .. tighten to 30 Nrn (Fig. J). Pins of riveted link (6) 2… 0… 00.20 ee eee .. rivet individually (Fig. J). Riveting (arrows) …….. see eee wee .. examine, re-rivet if necessary (Fig. K). Basic position of camshafts ….. cece ween set (05-2240). Chain tensioner ……… seen .. — install (05-3100). Basic position of camshafts …………060. check (05-2230).
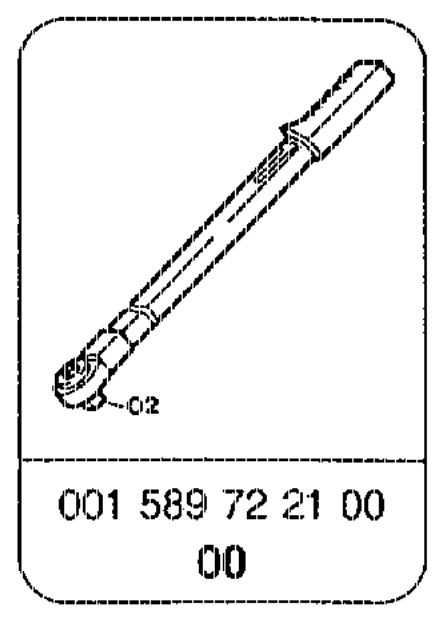
Special tools
aime RA 05.1922-3200/4