_—— Repairing radiator
WIS 20-425
Special tools
Tester for cooling system . and radiator cap – 001 589 48 21 00
Radiator cap with hose for leak test 4 op wooserae – 605 589 00 25 00
Conventional tool
Hex. socket wrench 7 mm on flexible shaft e.g. made by Hazet, D—5630 Remscheid for hose clips with worm-gear drive order No. 426–7
Note Since light-alloy radiators with plastic coolant tanks cannot be repaired by soldering, a sealing compound has been developed and approved.
This compound can also be used to seal heavy-metal radiators (non-ferrous metal radiators).
The sealing compound is a product on a siliconerubber base remaining permanently elastic in its end condition. Temperature resistance from —50 °C to +200 °C.
Because of the varying accessibility on radiator (e.g. in core more difficult than on coolant tank), the sealing compound is available in a diluted and in a nondiluted condition.
The different sealing compound versions, as well as the priming fluid, have been combined in a repair kit, part No. 123 989 00 20.
Designation Purpose
| Priming fluid Sealing compound non-diluted | Preparation of wash primer For sealing easily accessible areas |
| Sealing compound diluted | For sealing poorly accessible areas (e.g. laterally on cooling pipes) |
Sealing compound and priming fluid have a shelf life of approx. 1 year if always closed air-tight after use.
Turbid priming fluid should no longer be used.
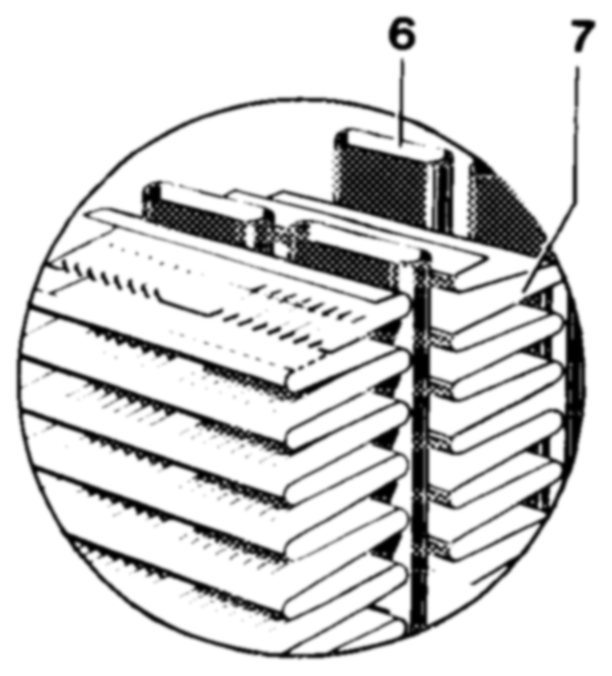
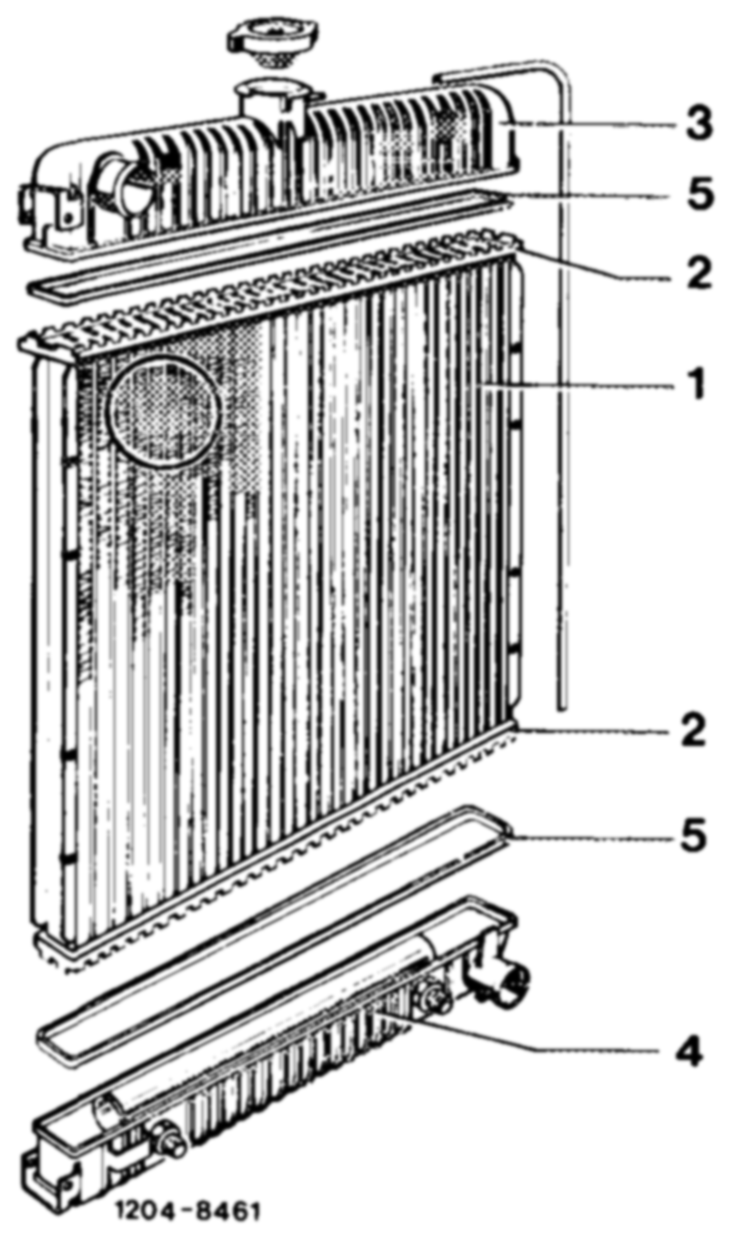
The following parts or spots in cooling system, as described in detail below, can be sealed with the sealing compound:
a) Plastic coolant tanks (3 and 4).
b) Heavy-metal coolant tanks (holes op up to 1.5 mm dia.).
c) Light-alloy and heavy-metal cooling pipes (6).
d) Pipe base (2).
1 Radiator core 5 Gasket
2 Pipe base 6 Cooling pipes
3 Coolant tank top 7 Gills
4 Coolant tank below
e) Bead flange (connection between radiator core and coolant tank).
f) Heat exchanger of heating system.
Damaged parts on coolant tanks which are subject to higher loads, such as torn or broken fastening brackets, cracks in fillet to connections, breaks and very long or large cracks on surface should not be repaired, since the sealing compound can take only a very low load.
Plastic coolant tanks of Behr radiators can be exchanged by means of special tools or fixtures in Behr radiator repair shops or in Inter-Radia Service Stations. tf required, contact the nearest Behr repair shop or Inter-Radia Service Station for such a possibility and find out whether such repairs can be made.
If there is no such possibility, replace radiator.
On heavy-metal radiators with plastic coolant tanks, soldering on core may be performed only up to a distance of 20 mm from coolant tank, since otherwise the high soldering temperature will damage gasket (5) and coolant tanks (3 or 4). Leaks which are closer to coolant tank should be sealed with sealing compound only.
If the leaking spot cannot be clearly localized in installed condition, the radiator need not be removed. In such a case, it will be enough to drain the coolant and to pressure-test the cooling system upon sealing with tester to 1–1.3 bar gauge pressure.
When handling priming fluid and sealing compound, observe the following precautions:
The priming fluid is easily inflammable (observe safety rules for dangerous materials Class A 1).
Acetic acid will be released up to complete linking (setting) of sealing compound. For this reason, avoid any skin contact. Clean affected parts immediately with water and soap. Rinse eyes with water and see a doctor, if required.
Sealing
1 If the leaking part cannot be localized beyond any doubt in installed condition, remove radiator (20-010). On model 115.017 with air-oil cooler, remove air-oil cooler on radiator.
2 Clean radiator.
3 Close hose connections for coolant hoses with self-made closing caps.
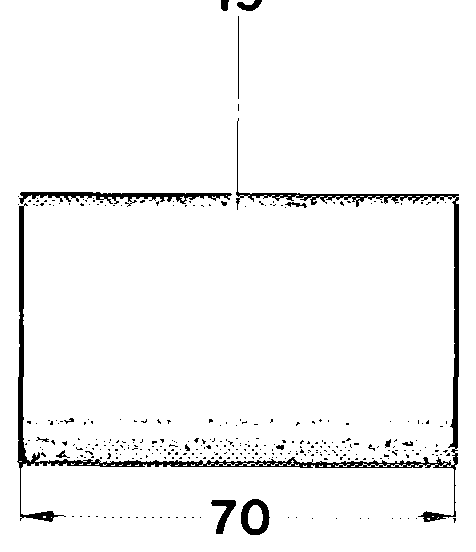
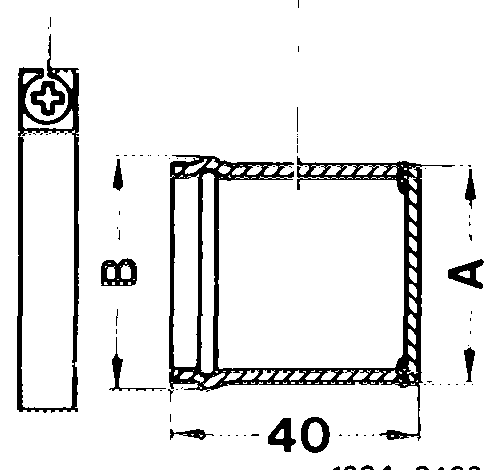
19 18 20
Required parts:
18 Hose clip L 36—46, part No. 916026 036000
19 Coolant hose part No. 123 501 13 82
20 Closing cap made from a tube A 36mm — Bo 37mm
4 Close at lower coolant tank the connections for transmission oil lines of transmission oil cooler by means of plastic caps or plugs made from old oil cooler lines. For this purpose, saw-off oil cooler line right behind nipple and close with solder.
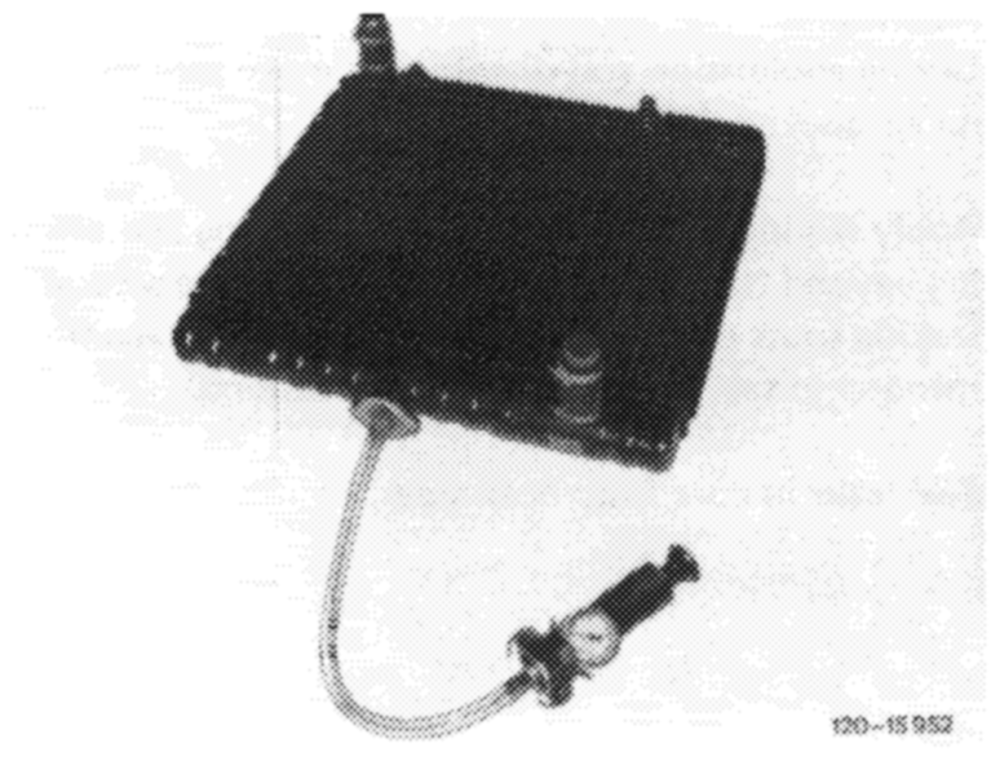
5 Connect tester to radiator.
6 Place radiator into water bath.
7 Pressurize radiator by means of tester and watch out for air bubbles rising up.
8 Mark leaking spot.
9 Take-out radiator and release pressure.
10 Blow radiator dry with compressed air.
11. Clean spot to be sealed by means of a commercially available cleaning compound (e.g. Tri or benzine). Always clean a slightly larger area than the spot to be sealed (e.g. for cracks, approx. 20–30 mm beyond end of cracks).
There is no need to remove paint. The radiator can then be blown dry at respective area with compressed air.
No dust or grease should remain.
12 Distribute priming fluid uniformly with a brush and apply very thinly.
Similar to cleaning, apply priming fluid beyond the spot to be sealed. In order to prevent the priming fluid from becoming dirty in container, pour the quantity required for repairs into a separate vessel.
Attention! When handling priming fluid, observe prevailing safety rules. Dangerous materials Class A 1, inflammable.
13 Let priming fluid dry for approx. 10 minutes at ambient temperature.
14 Set up radiator in such a manner that the sealing compound cannot run off the spot to be sealed.
15 Apply diluted or non-diluted sealing compound depending on accessibility. Use brush, spatula or the like for distributing compound.
Attention!
During application and distribution make sure that no air pockets will be generated.
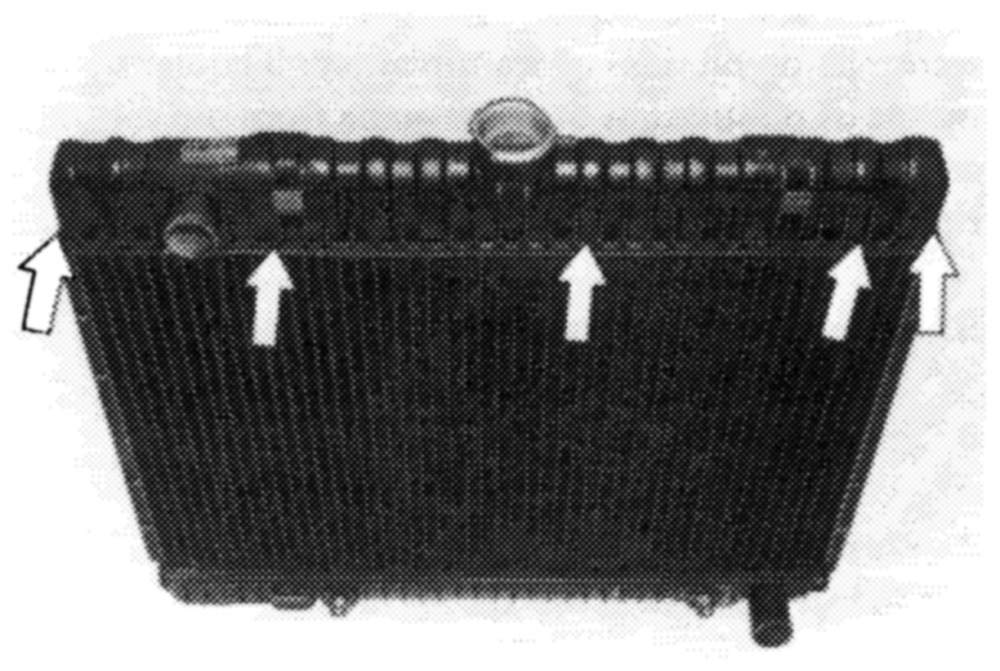
Apply sealing compound similar to cleaning and priming beyond the spot to be sealed. If there are several leaking spots on beaded collar (arrows), it is recommended to seal the beaded collar all-around.
Seal leaks in core from both sides.
429–18 953
After termination of sealing procedures, close tube again immediately, Acetic acid will be freed up to complete linking (setting) of sealing compound. Avoid skin contact. Clean affected parts immediately with water and soap, rinse eyes with water and see a doctor, if required.
16 For drying of sealing compound, leave radiator lying or standing up for at least 3 hours. Depending on quantity of sealing compound applied and size of spot to be sealed, linking of sealing compound to form a permanent, elastic connection will be completed after max. 24 hours at ambient temperature.
17. Pressure-test radiator in water bath for approx. 5 minutes at 1.5 bar gauge pressure.
If leaking spots are still showing, repeat sealing procedure, starting at item 8.
18 Remove tester and closing plugs.
19 On model 115.017 with air-oil cooler, mount airoil cooler to radiator and tighten fastening screws to
6 Nm.
20 Install radiator (20—420), fill-in coolant (20—010) and pressure-test cooling system by means of tester (1—1.3 bar gauge pressure) for leaks.