Removal and installation of slide rails
WIS 05-340
Nm Tightening torques Cylinder head cover capped nuts and bolts 5
Radiator drain plug. 10 Ball locating ring in chain tensioner 25
Necked-down screw camshaft sprocket 80
Balance disc to crankshaft 400+50
Oil cooler drain plug 35
Special tools
Impact extractor for bearing pin (basic unit) – 116 589 20 33 00
aid Bolt 6 x 50 for impact extractor – 116 589 01 34 00
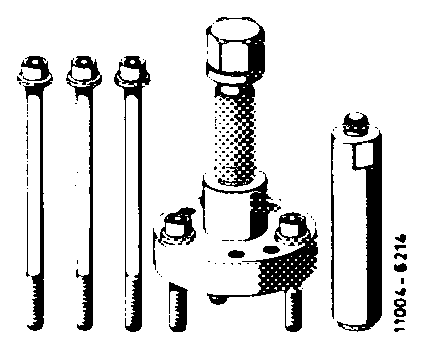
Bolt 6 x 150 for impact extractor Bolt 10 x 100 for impact extractor – 116 589 03 34 00
Balance disc extractor – 116 589 10 33 00
Rigid chain tensioner – 110 589 03 31 00
Chain tensioner holder – 110 589 02 31 00
Holder – 116 589 01 40 00
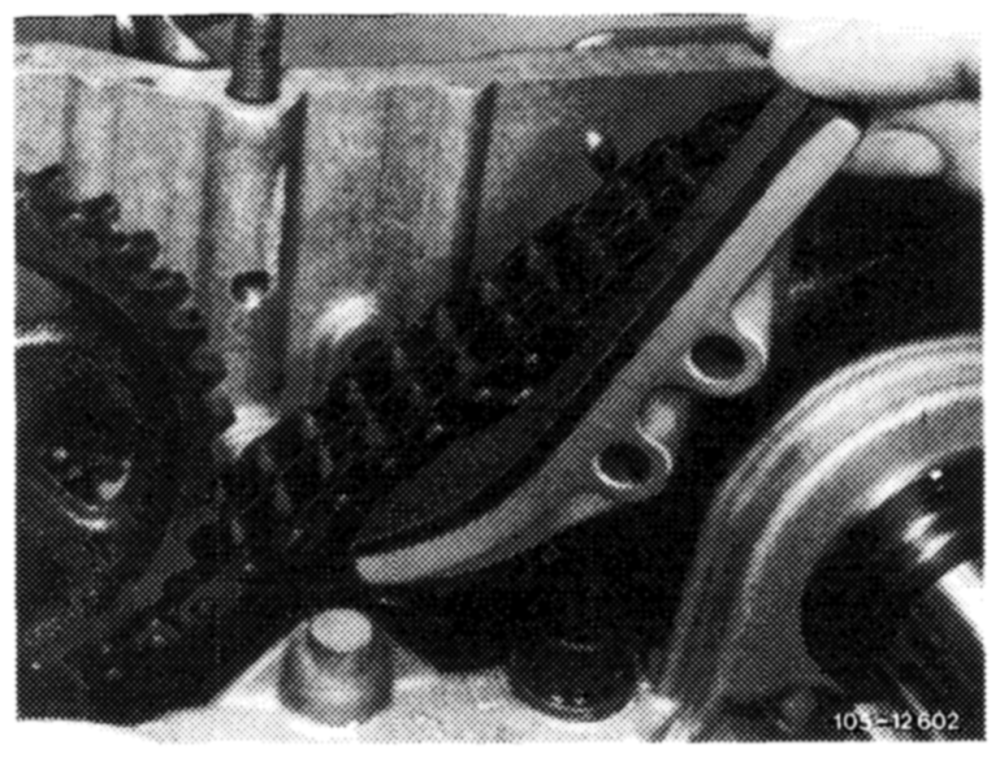
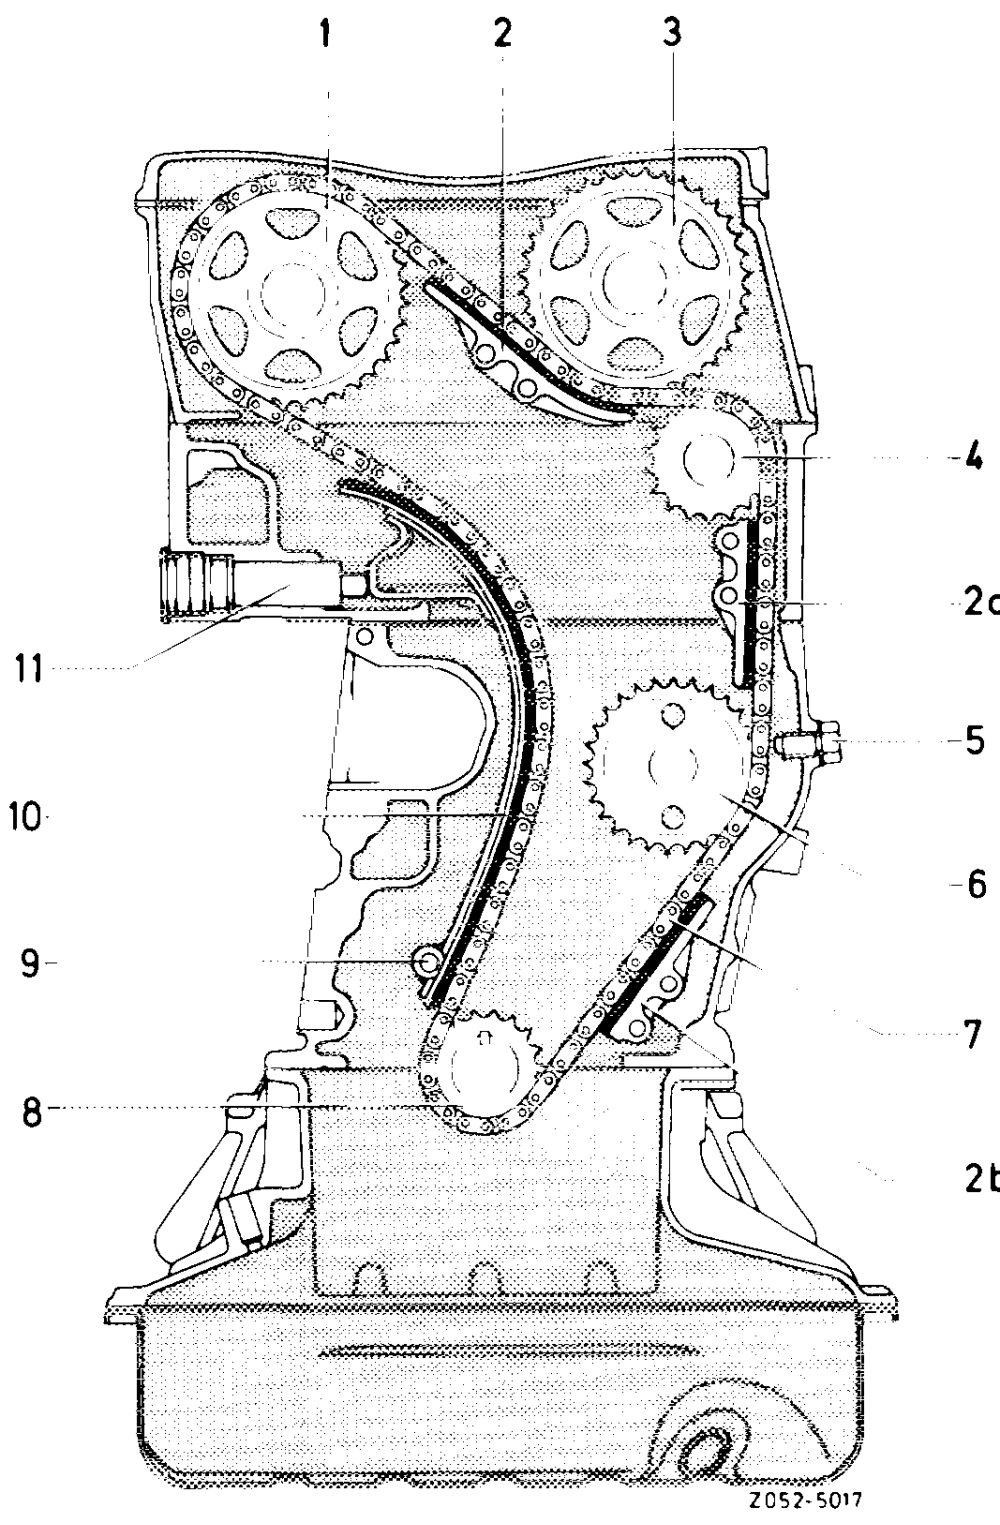
Sliding rail (2) in camshaft housing
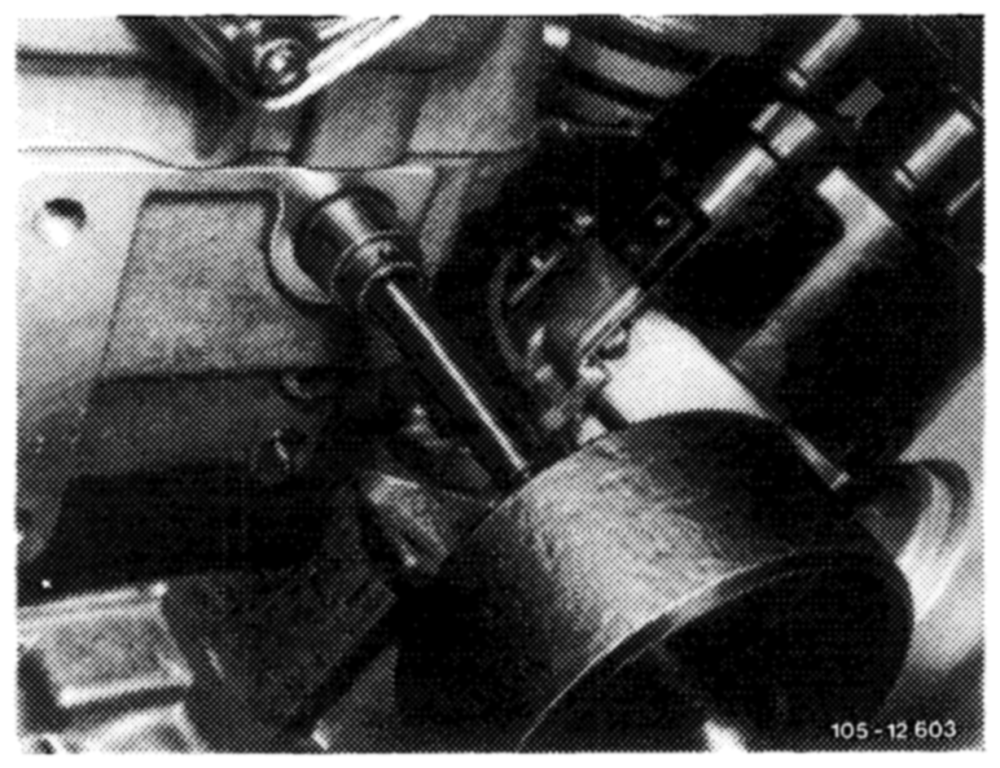
1 Remove valve cover and knock out sliding rail pin with an impact extractor. Remove sliding rail.
2 Watch position of sliding rail when installing.
Coat collar of sliding rail pin with a sealing compound.
Sliding rail (2a) in cylinder head
1 Remove radiator.
2 Remove chain tensioner or spring in chain tensioner (05-310).
3 Mark relation of camshaft sprockets and timing chain with paint.
4 Remove sliding rail (2) in camshaft housing.
Chain drive
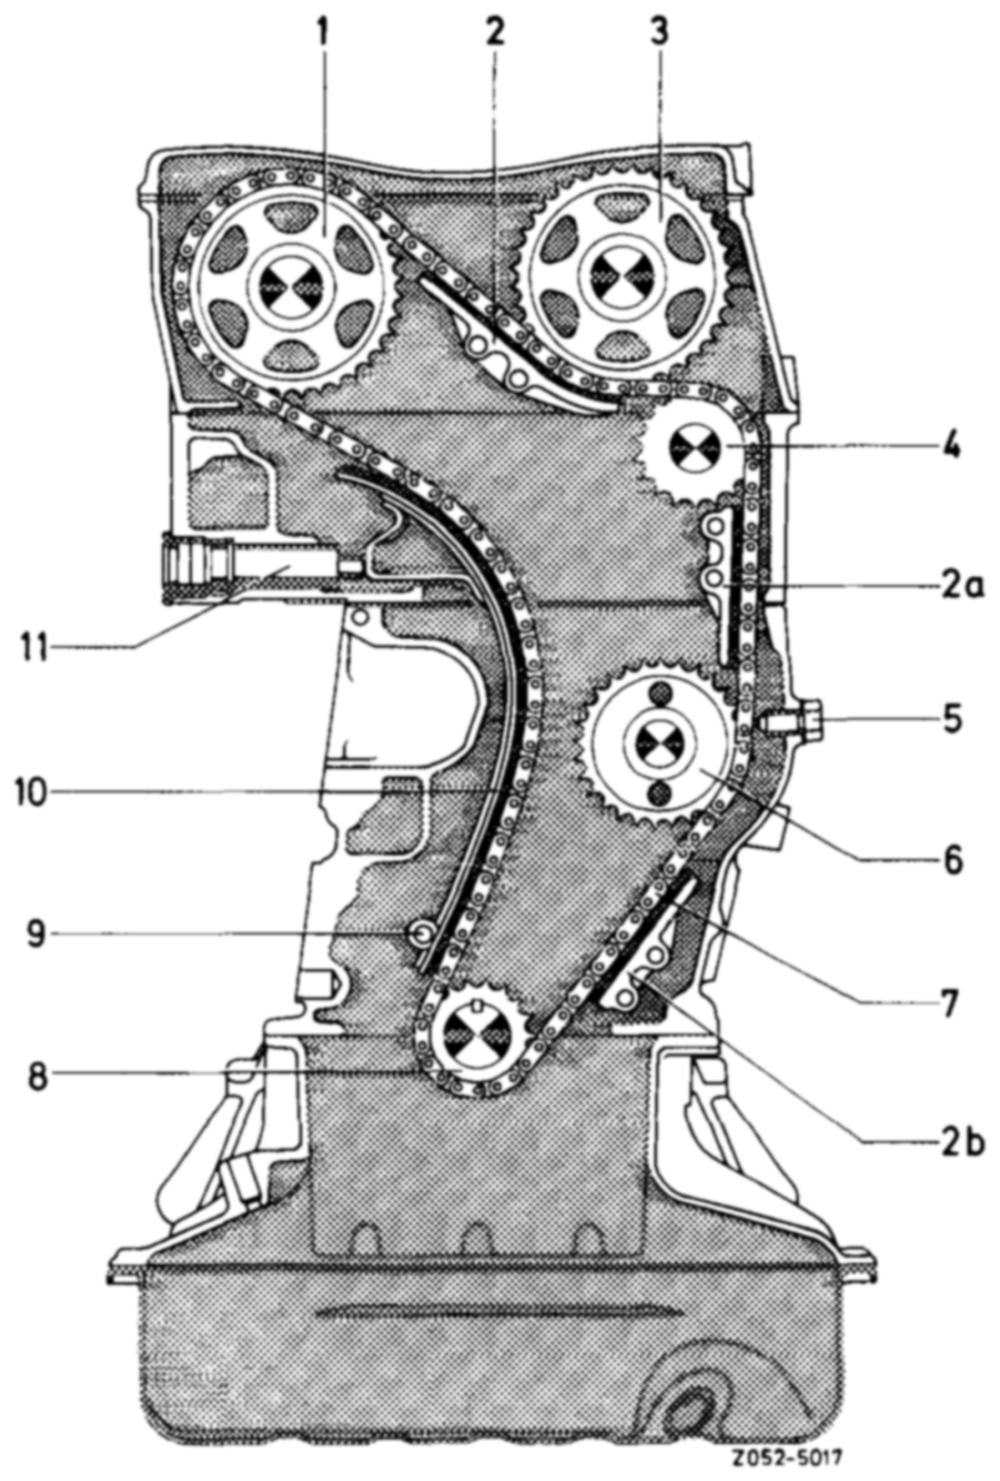
1 Exhaust camshaft sprocket 2-—2b = Sliding rail SW H-OWOMNMAM Intake camshaft sprocket Guide wheel Lock screw Intermediate wheel Timing chain Crankshaft sprocket Tensioning rail bearing pin Tensioning rail Hydraulic chain tensioner
5 Connect a wire hook (5 mm thick) to guide wheel (4) and knock out the bearing pin with an impact extractor (10 mm bolt). Remove guide wheel.
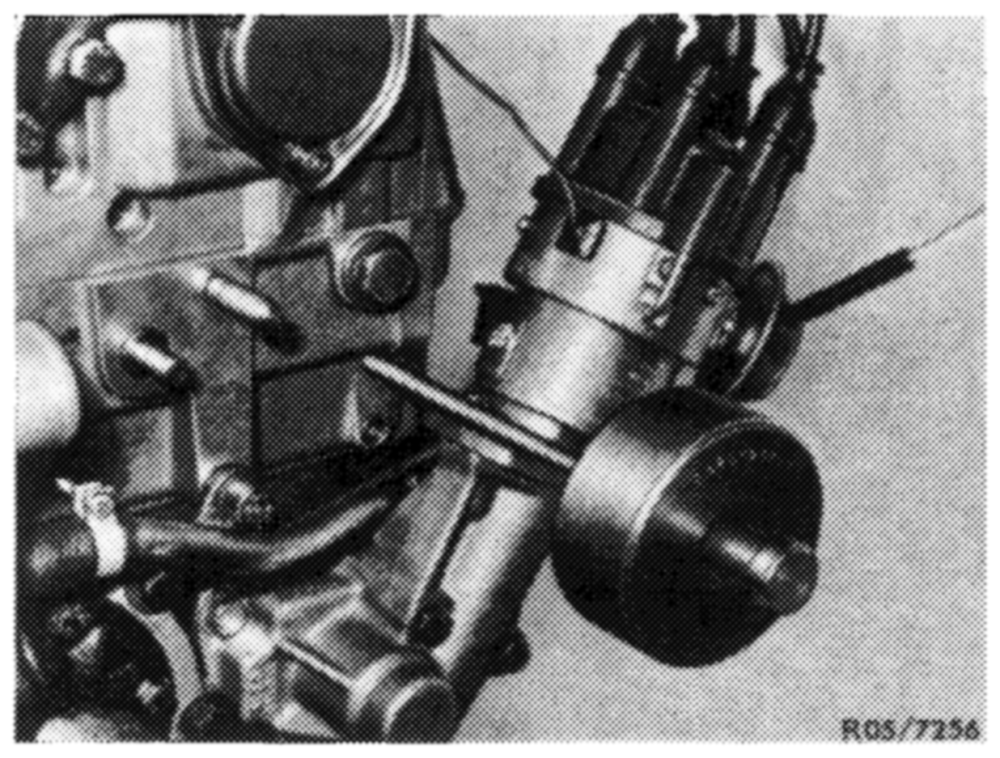
6 Knock out sliding rail pin with an impact extractor and pull out sliding rail with a wire hook.
7 Installation in reverse sequence of removal.
Sliding rail (2b) in crankcase
1 Remove radiator.
2 Remove entire oil pan (01—310).
3 Remove vibration damper and balance disc (03—340).
4 Mark relation of camshaft sprockets and timing chain with paint.
5 Remove sliding rai! (2) and guide wheel (4).
6 Remove chain tensioner or compression spring (05—310).
7 Knock out sliding rail pin with an impact extractor and remove sliding rail.
8 Installation in reverse sequence of removal.