Removing and installing exhaust system
WIS 49-7000
Preceding work: Operation no. of operation texts and work units or standard texts Removing and installing engine compartment pane! and flat rates: Removing and installing, replacing and bolting exhaust 49-7000. system as of plug connection (49-7280).
A. Model 107
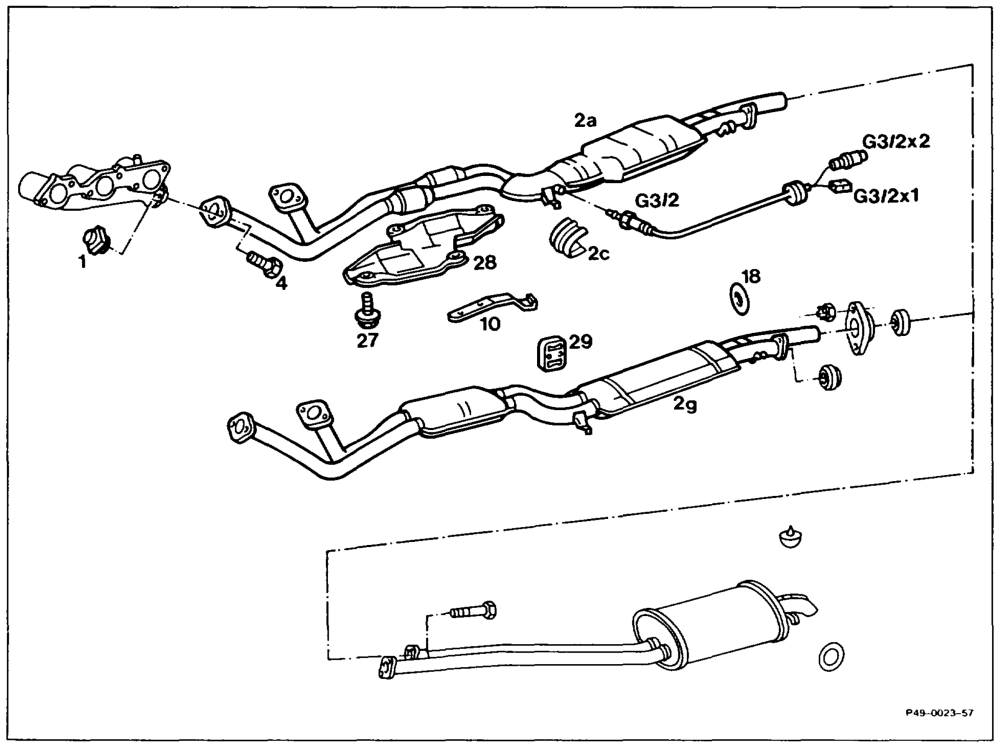
Plug connection, oxygen sensor heating coil (G3/2×1) and plug connection, oxygen sensor signal (G3/2×2) … 2… ee ee ee eee in right footwell, below cover plate, separate, plug together. Heat shield (2c) 2.2… 0… eee eee pull off, fit on. Pay attention to installation position. Oxygen sensor (G3/2) ……….2 0000 eee unscrew, install.
Installation note
Coat thread with paste 000 989 88 51. Ensure the cable is correctly routed.
we RA 49.1142-7000/1
unscrew, screw in. Take off flame shield (28), fit Bolts (27) 2… 0… ee ee ee eee on (only ©). Bolts (4) 2.0.2.2… eee ee ee ee eee unscrew, screw in. Replace bolts (4). Tightening torque 25 Nm (reference value). Rubber rings (18, 29) detach, attach. Check whether damaged and worn. Front exhaust pipe with front and underflow catalytic converter (2a) or front exhaust pipe with front and centre silencer (2g) ……..-.. take off, fit on. Riveted nuts (1) 2. 0.2002 e eee at exhaust manifold, remove, install. Knock out riveted nuts with a suitable tool, (e.g. bolt).
installation note
Install riveted nuts with cocking bolt 103 589 01 39 00. Tightening torque of cocking bolt 30 Nm (reference value). Carrier (10) 6… ee cc ee check suitability for reuse, replace if necessary. Exhaust system ……………….0000. with engine running, check for leaks.
Special tools
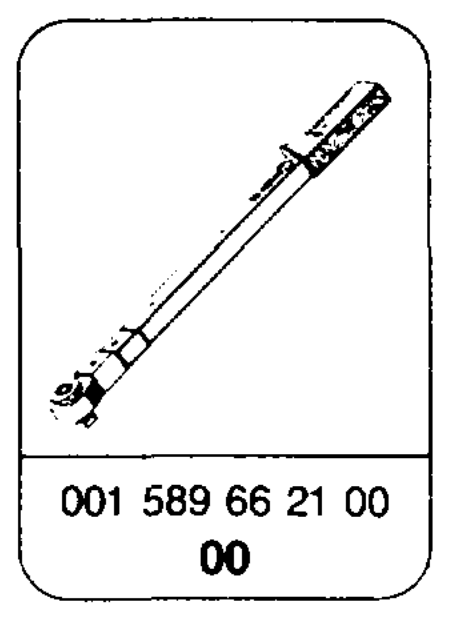
B – 103 589 01 39 00
4 J NY
wie §=RA 49.1142-7000/2
Location of oxygen sensor plug connection
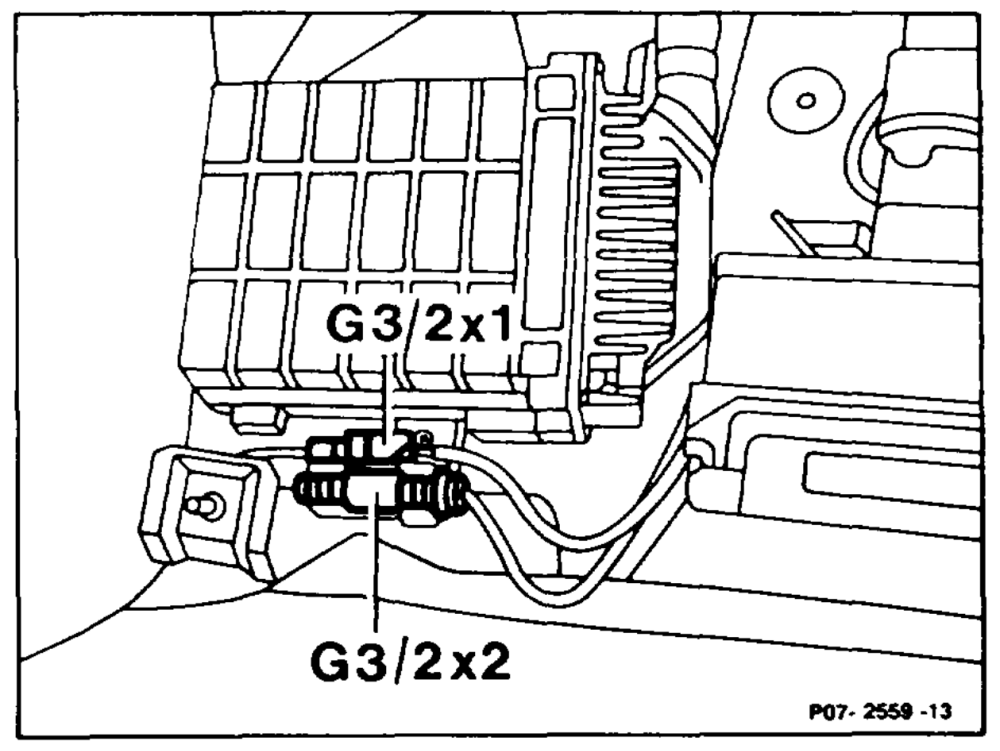
G3/2×1 Plug connection, o: sensor heating coil oe een G3/2x2_ Plug connection, oxygen sensor signal
wae RA 49.1142-7000/3
B. Models 124, 126, 201
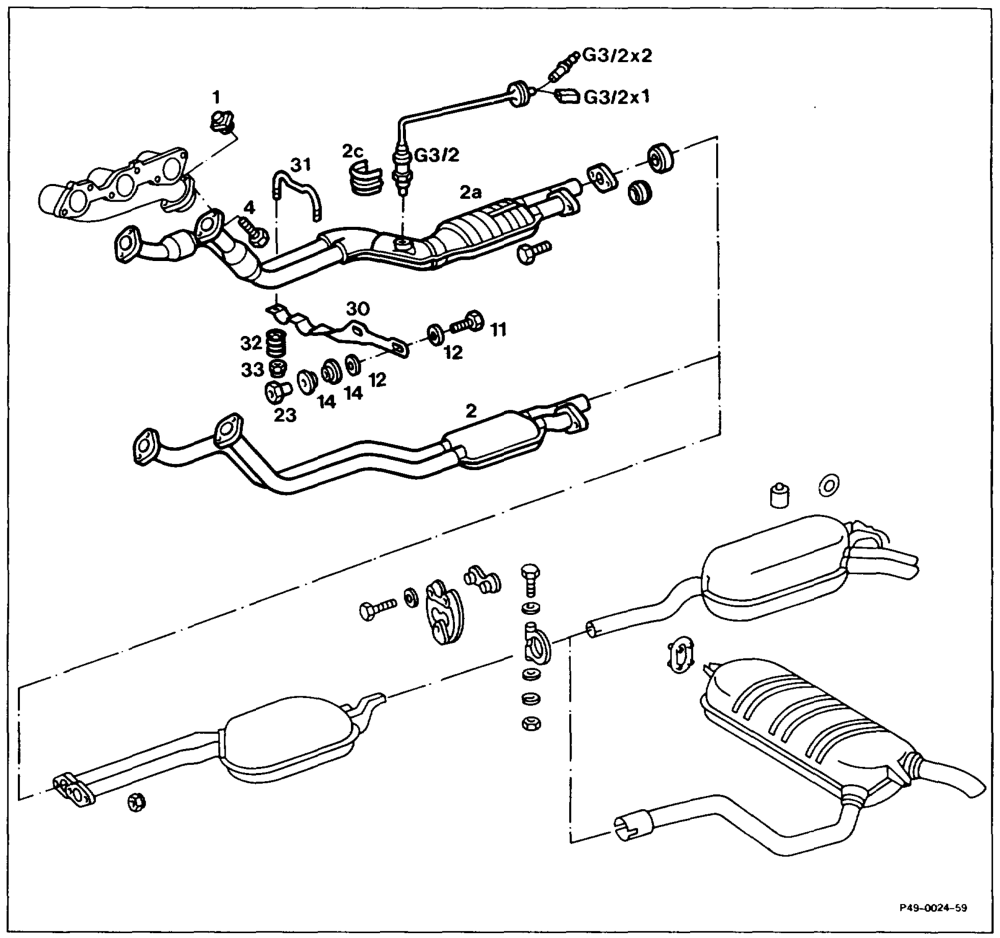
Shown on model 124
Plug connection, oxygen sensor heating coil (G3/2×1) and plug connection, oxygen sensor Signal (G3/2×2) 2.0… ee ee eee in footwell, separate, plug together. Heat shield (2c) …………-0eee eee eee pull off, fit on. Pay attention to installation position.
time §=RA 49.1142-7000/4
Oxygen sensor (G3/2) …………..200– unscrew, install.
installation note
Coat thread with paste 000 989 88 51. Ensure cable is correctly routed. Retaining bar (31) with dished springs (32) and self-locking nuts (33) 000008 take off, fit on. Tightening torque 7 Nm (reference value).
Installation note
Check parts and replace if necessary.
AN Pay attention to illustration note for installing dished springs. Bolts (4) 2… ee eens unscrew, screw in. Replace bolts (4). Tightening torque 25 Nm (reference value). Carrier (30) with bolts (11), washers (12), rubber washers (14) and nuts (23) …………..4. take off, fit on. Tightening torque 20 Nm (reference value).
Installation note
Check parts and replace if necessary. Front exhaust pipe with front and underflow catalytic converter (2a) or front exhaust pipe with silencer (2) 2.0.2… cee eee eee take off, fit on. Riveted nuts (1) …………….2-02000at exhaust manifold, remove, install. Knock out riveted nuts with suitable tool (e.g. bolt).
Installation note
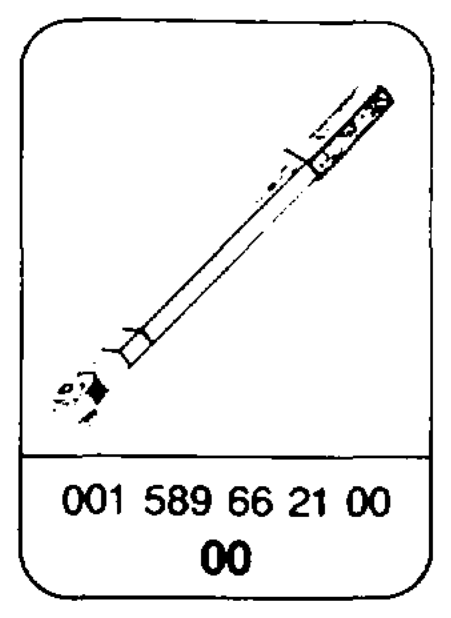
Install riveted nuts with cocking bolt 103 589 01 39 00. Tightening torque of cocking bolt 30 Nm (reference value). Exhaust system ……………..-000005 with engine running, check for leaks.
wie §=RA 49.1142-7000/5
Special tools
cr \
‘s
5 l4
& – 103 589 01 39 00
4 Poo’
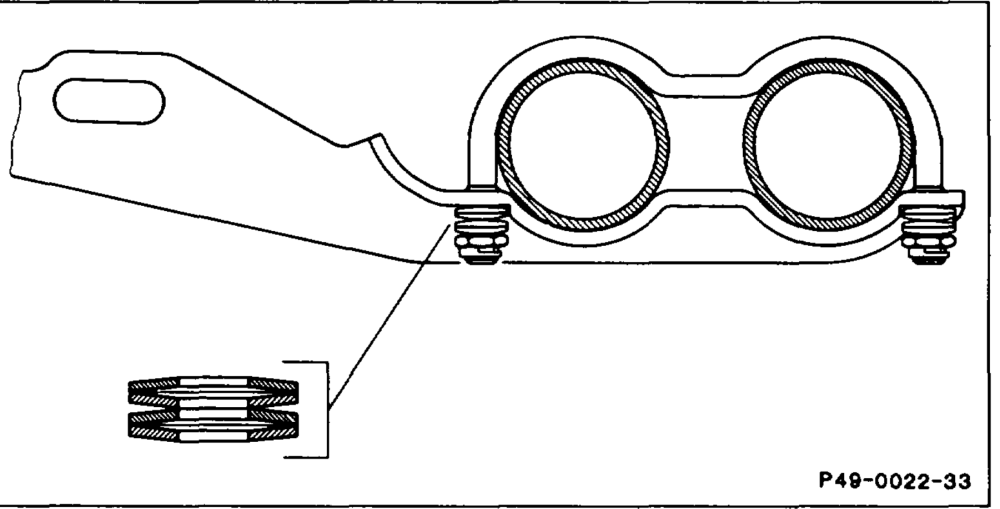
A Install the dished springs at the retaining bar so that the curved face is always opposite the other (as illustrated).
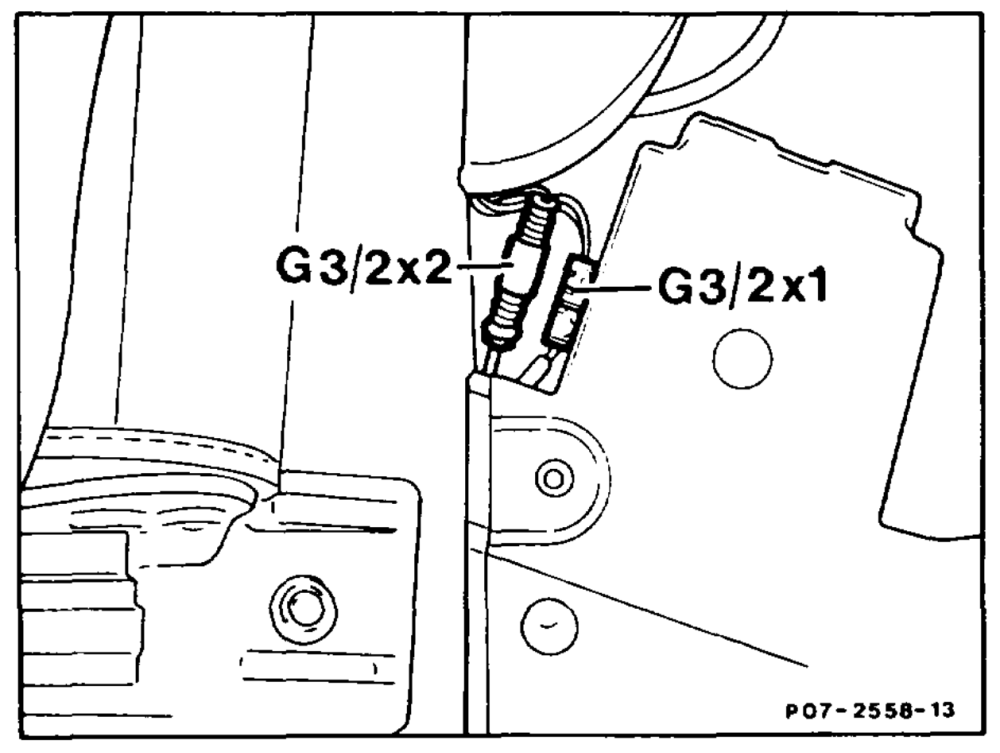
Model 124 G3/2×1 Plug connection, oxygen sensor heating coil G3/2×2 Plug connection, oxygen sensor signal
time §=RA 49.1142-7000/6
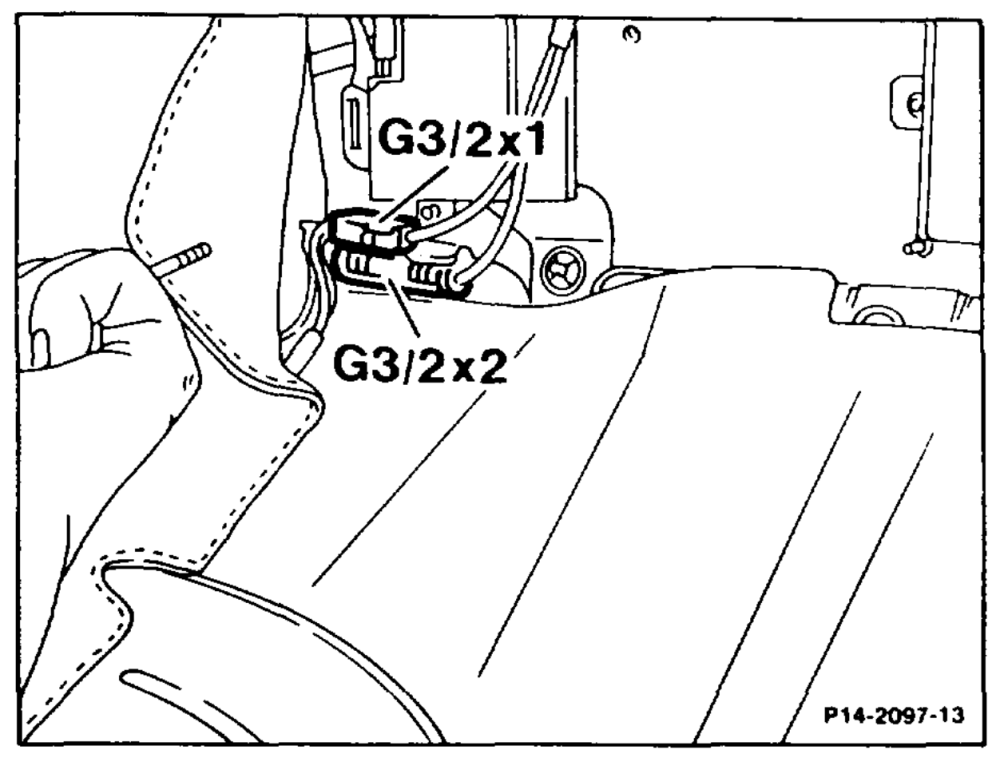
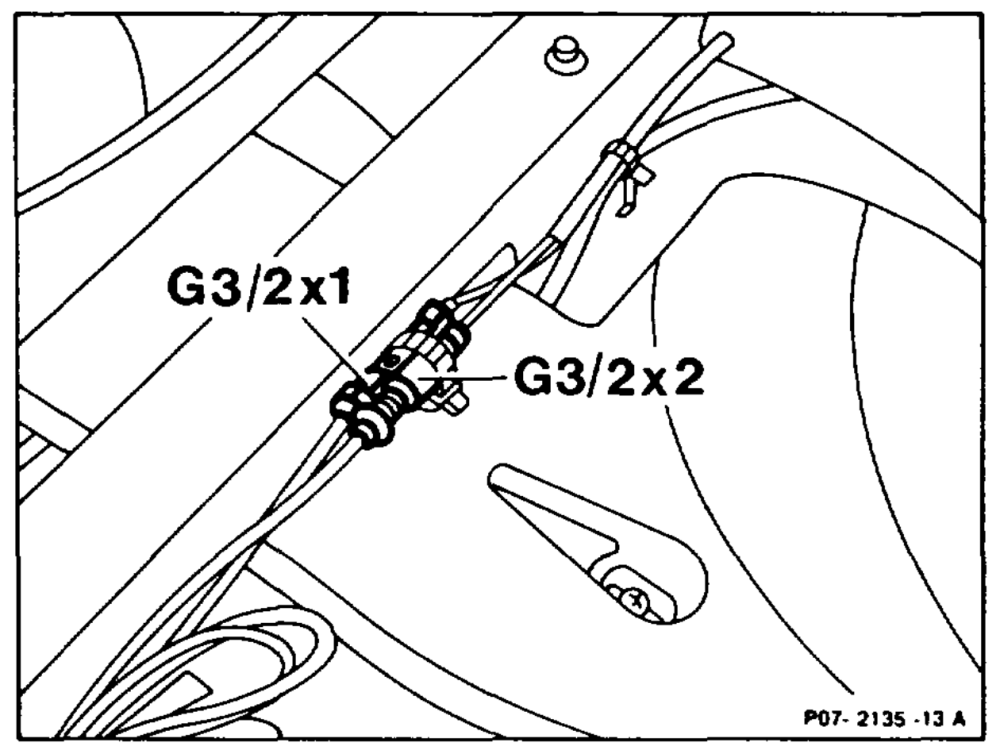
Model 126 G3/2x1__ Plug connection, oxygen sensor heating coil G3/2×2 Plug connection, oxygen sensor signal
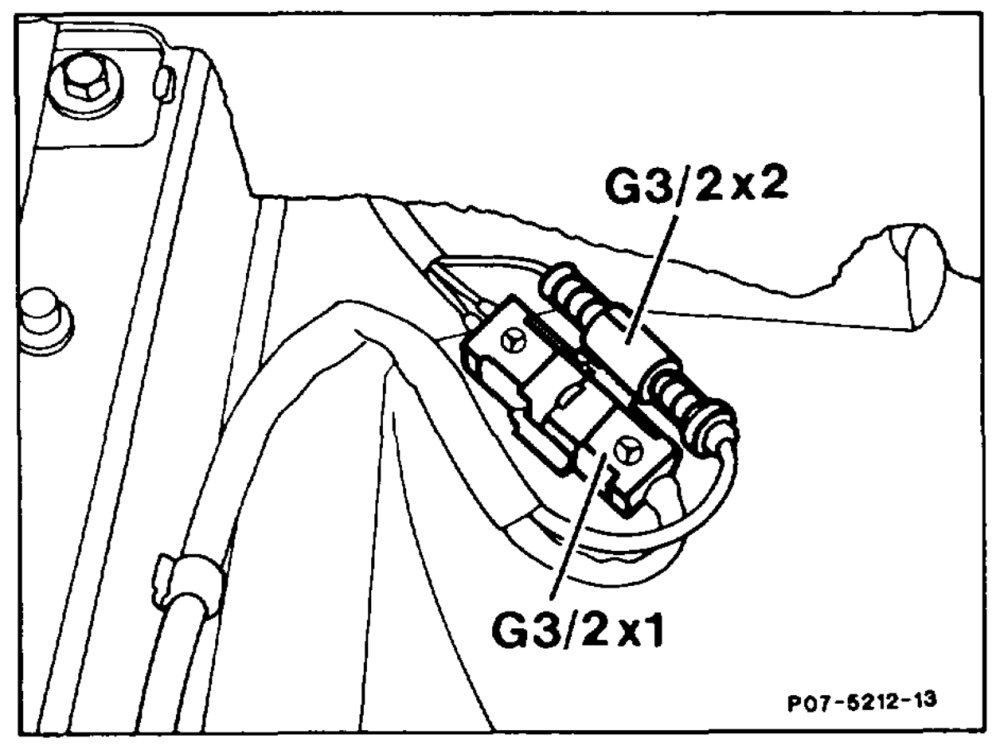
Model 201 1st version G3/2x1_ Plug connection, oxygen sensor heating coil G3/2×2 Plug connection, oxygen sensor signal
Model 201 2nd version G3/2x1_ Plug connection, oxygen sensor heating coil G3/2×2 Plug connection, oxygen sensor signal
tie §=RA 49.1142-7000/7
C. Model 129
P49-5016–59
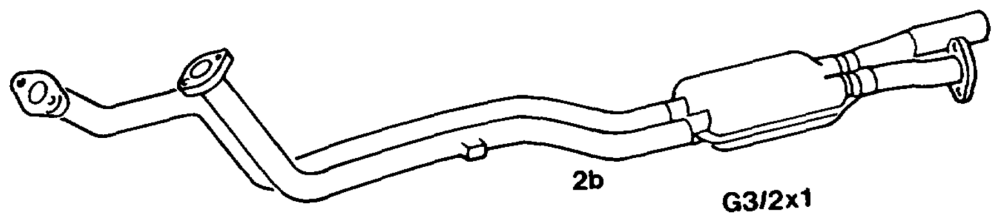
Plug connection, heated oxygen sensor (GS/2K1) ee eee ee separate at outside right of transmission tunnel, plug together.
Note Slackening union nut = counter-clockwise Tightening union nut = clockwise
wile §=RA 49.1142-7000/8
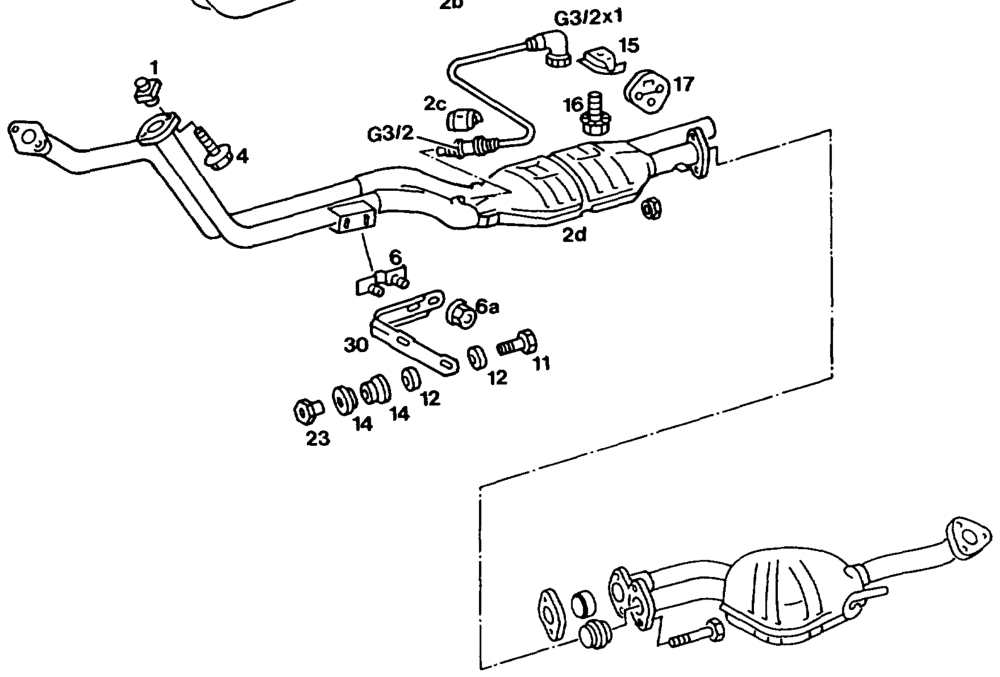
Heat baffle (2c) 2.2.2.2… 0.2… 02.2. pull off, fit on. Pay attention to installation position. Oxygen sensor (G3/2) ……………00005 unscrew, install.
Installation note
Coat thread with paste 000 989 88 51. Ensure the cable is correctly routed. Self-locking nuts (6a) …………….005. unscrew, screw on, replace. Tightening torque 20 Nm (reference value). Carrier (30) with bolts (11), washers (12), rubber washers (14) and nuts (23) …………-… take off, fit on. Tightening torque 20 Nm (reference value).
Installation note
Check parts and replace if necessary. Threaded plate (6) …………—220-06check suitability for reuse, replace if necessary. Bolts (4) 2… eee unscrew, screw in. Replace bolts (4). Tightening torque 23 Nm (reference value). Rubber ring (17) 2… 20.2.2… cee eee eee eee detach, attach. Check for damage and wear. Front exhaust pipe with underflow catalytic converter (2d), or front exhaust pipe with front silencer (2b) 0.00.02 ee eee take off, fit on. Bolt (16) 2… eee ee eee replace. Tightening torque 25 Nm (reference value). Holder (15) wee eee ee eee check suitability for reuse. Riveted nuts (1) 2. ……-….2–2 20 c ee eee at exhaust manifold, remove, install. Knock out riveted nuts with suitable tool (e.g. bolt).
Installation note
Install riveted nuts with cocking bolt 103 589 01 39 00. Tightening torque of cocking bolt 30 Nm (reference value). Exhaust system 2… 2… 0… 00002. with engine running, check for leaks.
wie §=RA 49.1142-7000/9
Special tools
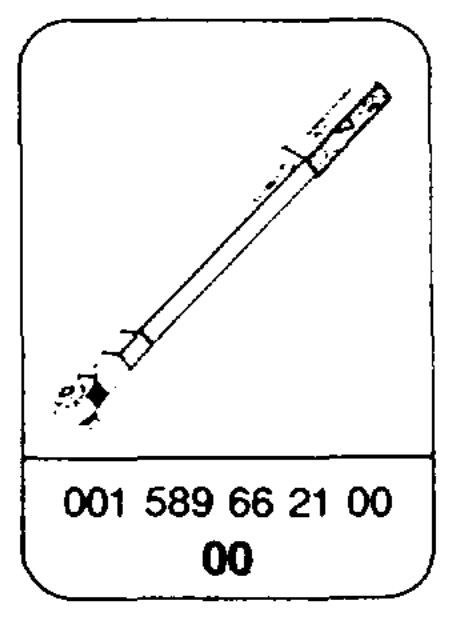
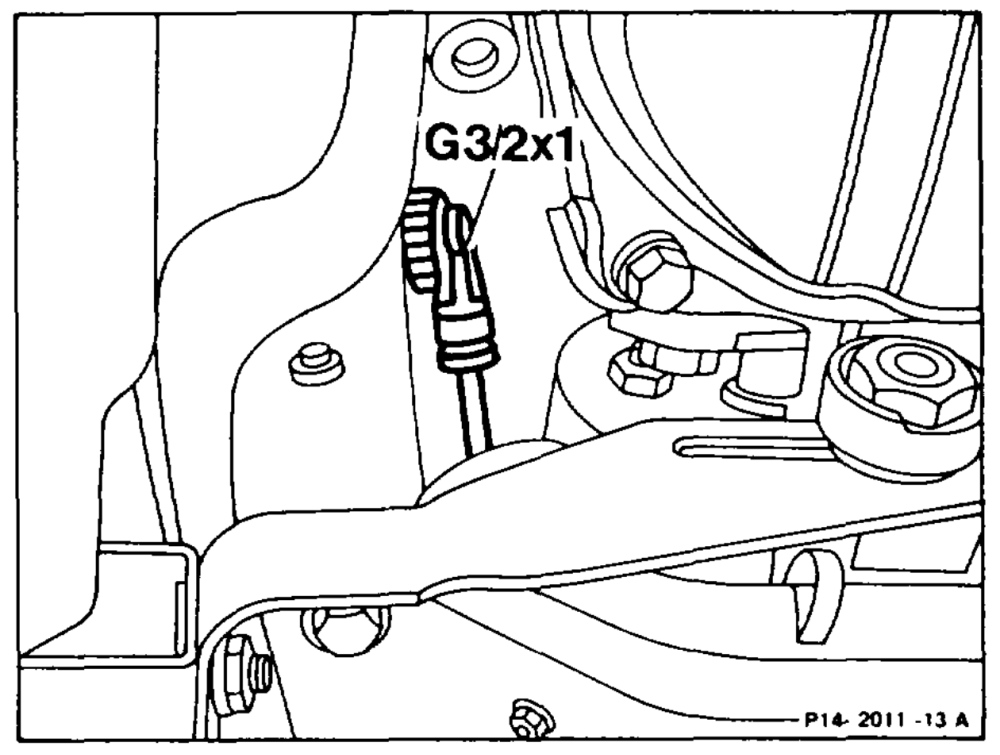
\ “4 Ao’ LL ~ – 103 589 01 39 00
G3/2×1 Piug connection, heated oxygen sensor